
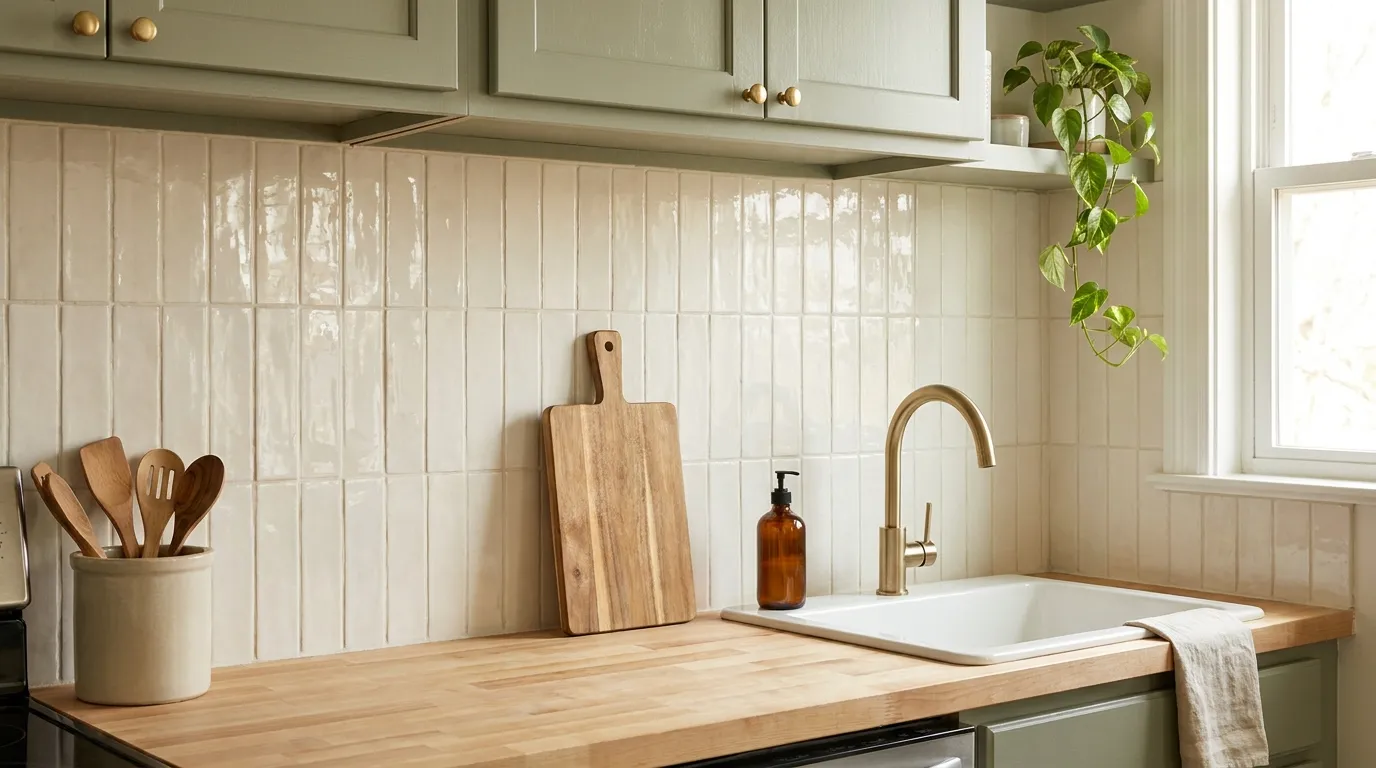
Your rental kitchen probably came with a backsplash you didn’t choose, or no backsplash at all. Maybe it’s tired beige tile, a blank painted wall that catches every splatter, or dated squares that make the whole room feel older than it is. You want something that looks custom, but you also want your deposit back.
The good news is that peel and stick products have come a long way. Many of these temporary backsplash ideas look so much like the real thing that guests won’t guess, and most come off cleanly when you move.
Below you’ll find 10 looks that work in small kitchens and apartments. Some come from real homes, like glossy handmade style tile stacked vertically, a dusty pink grid that warms up dated oak cabinets, and painted beadboard with a cottage feel.
Others are fresh ideas, including a faux marble slab with no grout lines and tile stickers that cover old tile without removing a thing. Each one comes with honest install tips, so it looks permanent on your wall too.
1. Stack Glossy Zellige-Style Tiles Vertically
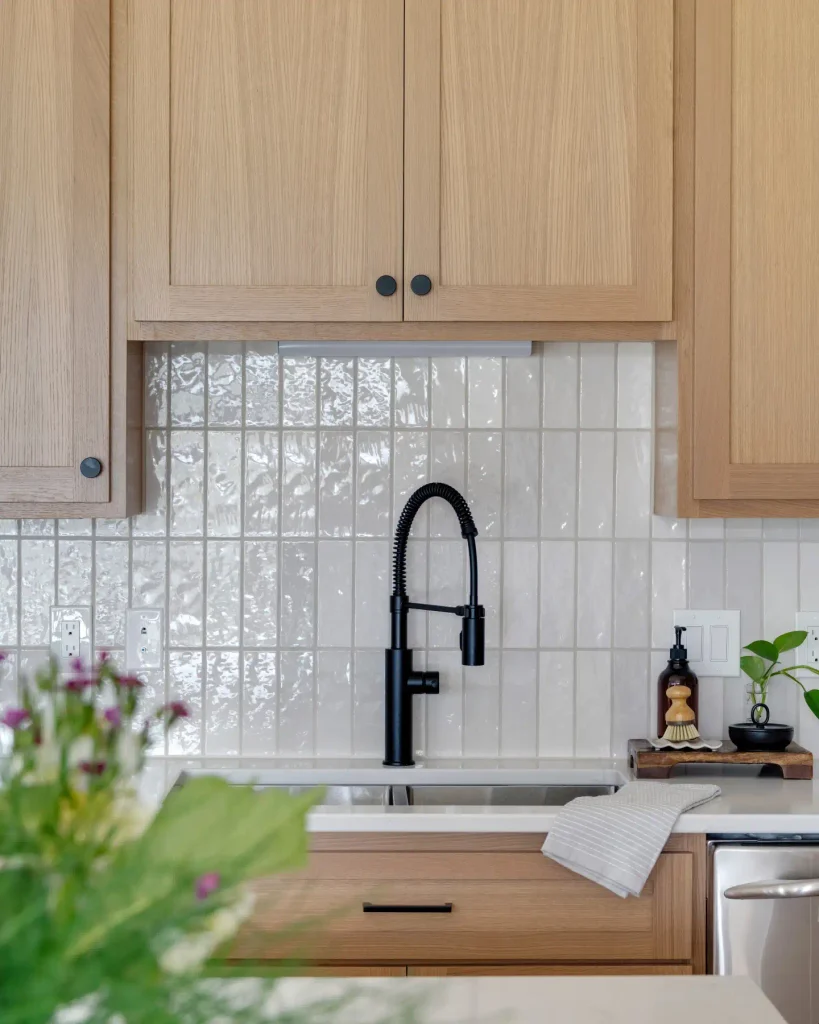
Long, skinny tiles running straight up the wall make a short backsplash look taller. In this kitchen the glaze is wavy and shiny, so each tile catches the light a little differently. That uneven shine is what reads as handmade.
What makes it work here:
- The tiles sit in a straight vertical stack, not staggered
- Soft grey grout lines frame each tile without competing with it
- Warm oak cabinets keep the white from feeling cold
- A matte black faucet and black knobs give the eye a clean stopping point
Peel and stick tiles with a glossy, rippled finish can get you very close to this. Pick a slightly creamy white. Stark bright white tends to flatten the handmade effect.
Draw a level pencil line before the first row. In a stacked layout, even a small tilt shows across the whole wall.
Wipe the wall with rubbing alcohol and let it dry fully so the adhesive grips well.
Sticking tiles over greasy or bumpy walls. They will lift at the edges first.
Starting at a corner and hoping the lines stay straight. Start from your level line instead.
2. Warm Up Dated Oak Cabinets With Dusty Pink Square Tile
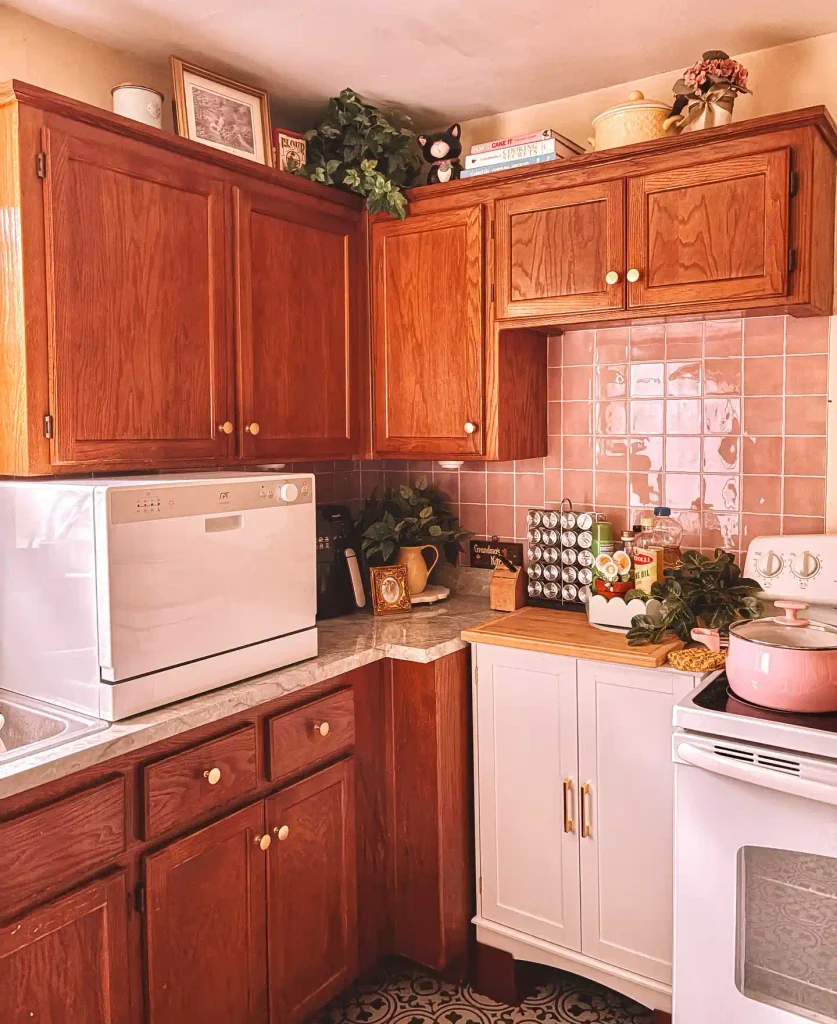
Orange oak cabinets don’t have to be the problem.
In this small corner kitchen, square tiles in a soft dusty pink sit right under the uppers, and the wood suddenly looks warm on purpose. The glossy, slightly wavy glaze bounces light around a tight space, and crisp white grout lines keep the grid neat.
Notice how the pink shows up again in other spots. A pink pot sits on the stove, and gold-tone knobs pick up the warm tones in both the wood and the tile. Those small repeats make one bold color choice feel planned.
Most renters stuck with honey oak reach for plain white tile. A muted pink often does more.
If the oak cabinets themselves are what bothers you, you can update rental cabinets without paint or new hardware.
Recreate this look
3. Go Farmhouse With Whitewashed Faux Brick
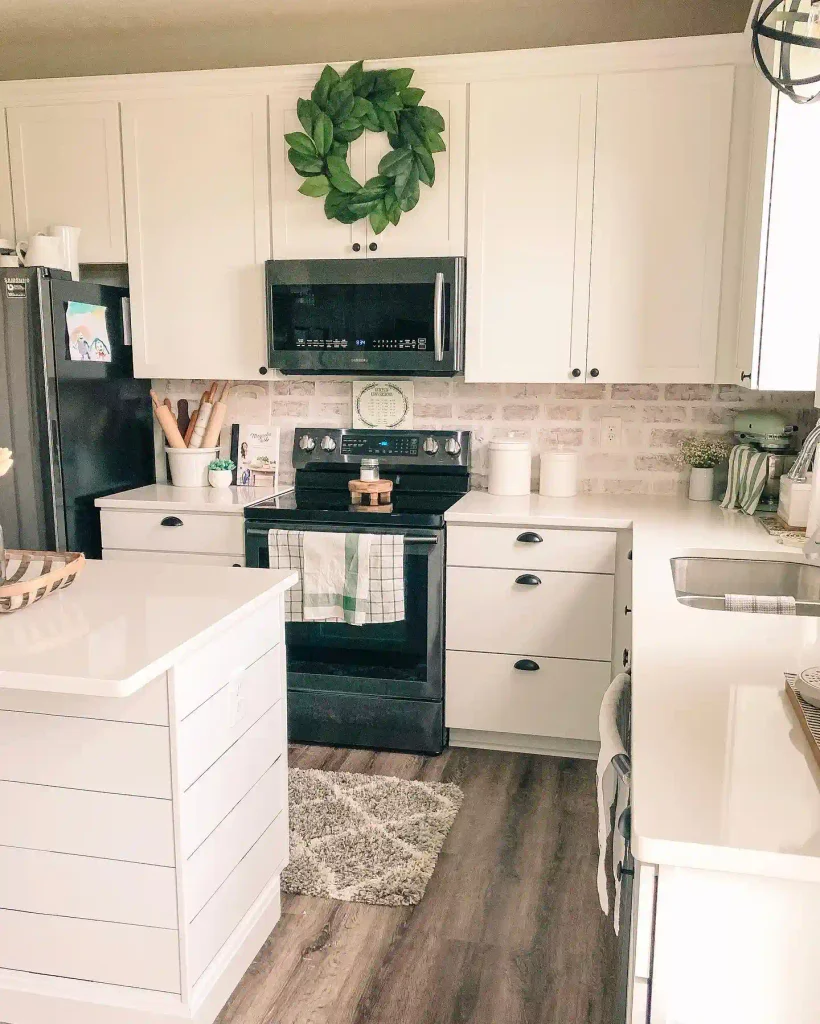
Brick behind a stove sounds like a big renovation. The whitewashed kind is one of the easiest looks to fake.
Here, the brick has a soft, chalky wash over it, so hints of tan and blush peek through the white. That keeps it from fighting the white shaker cabinets and white counters. It just adds texture. Black cup pulls, black appliances, and a shiplap island lean into the farmhouse feel.
For a rental, you have two main routes: textured faux brick panels or peel and stick brick wallpaper. Each has trade-offs worth knowing before you buy.
One warning. Heavily printed brick wallpaper can look flat up close, so pick a pattern that’s light and washed out like this one.
| 🧱 Faux brick panels | 📜 Brick wallpaper | |
|---|---|---|
| Look | Real raised texture with shadows in the grout lines. | Flat. The texture is printed on. |
| Install | Cut with a utility knife or saw. Trickier around outlets. | Cuts with scissors. Easy around outlets and corners. |
| Rental risk | Light foam panels can use removable mounting tape. Heavier ones often need adhesive that can damage walls. | Usually peels off smooth painted walls cleanly. Test a small patch first. |
| Cleaning | Grooves catch grease and need a soft brush. | Vinyl versions wipe clean with a damp cloth. |
| Cost | Medium | Low |
| 📌 Going behind the stove? Check the product’s heat rating first, whichever route you pick. | ||
4. Line the Wall With Painted Beadboard for a Cottage Kitchen
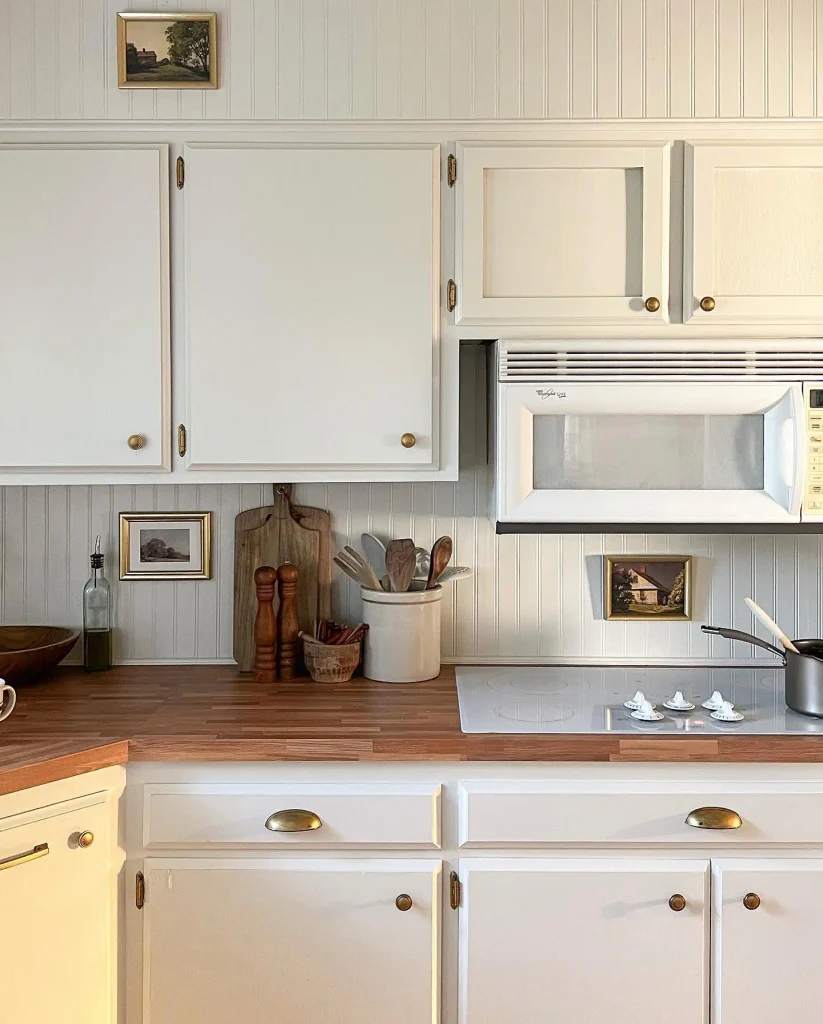
Beadboard is one of those backsplash looks that feels old in the best way. In this kitchen it runs under the cabinets and keeps going above them, so the whole wall reads as one cozy, finished surface. Warm wood counters plus brass knobs and cup pulls keep all that white from feeling plain.
To get it in a rental:
- Choose thin beadboard panels or peel and stick beadboard. Thin panels can go up with heavy-duty removable mounting strips, as long as you check the weight rating.
- Paint the panels before they go up, so no paint ever touches your rental walls.
- Keep the grooves running straight up and down, and add a thin strip of trim where the panels meet the counter.
Last touch: hang one small framed painting right on the beadboard with a tiny nail into the panel, not the wall behind it. That little detail makes the backsplash look like it’s been there for years.
5. Fake a Marble Slab With No Grout Lines
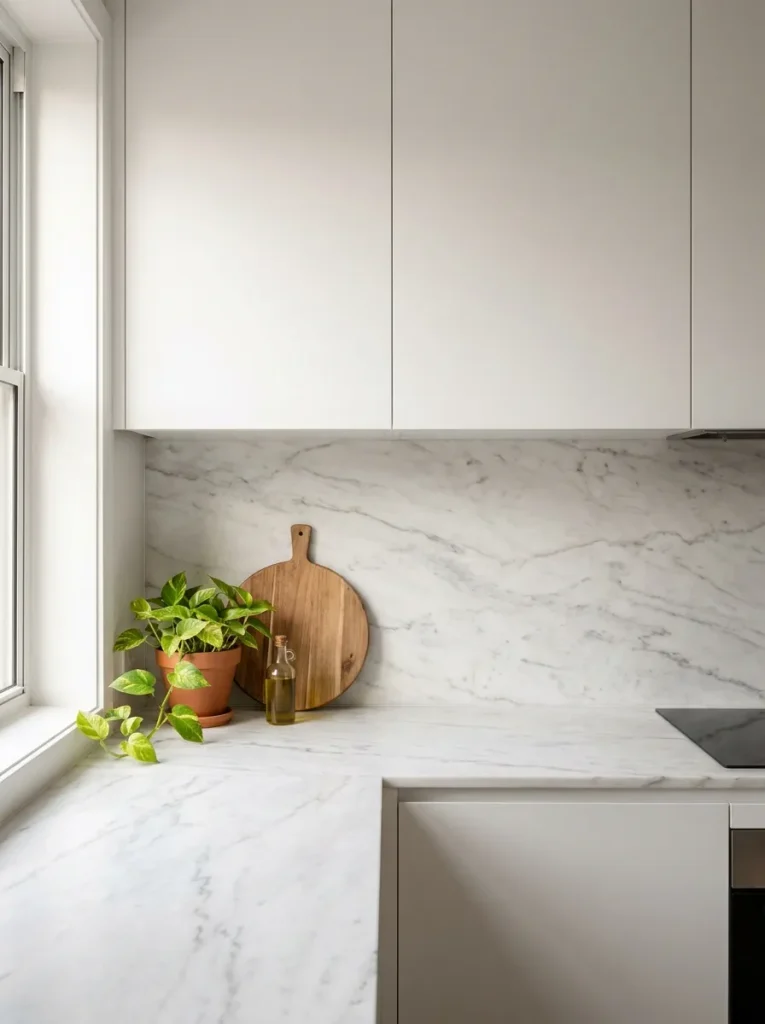
Real marble slab backsplashes cost a lot, which is exactly why a faux one feels so high end. The trick is one smooth, continuous surface with soft grey veining running from the counter up to the cabinets. No grout lines means nothing gives it away.
There are two ways to get it.
Thin marble contact paper is cheap and quick to smooth on, but it shows every bump and dent in the wall underneath.
Thicker peel and stick marble sheets cost more, hide small wall flaws, and feel more solid when you tap them.
Whichever you pick, line up the veins where two sheets meet. That one step is what sells the slab.
Want the counters to match? Here’s how to make over rental countertops without replacing them, using peel-and-stick film and a squeegee.
Choose a satin or soft semi gloss finish. Super glossy vinyl can look like plastic under kitchen lights, and a fully matte one can look like paper.
6. Cover Dated Tile With Tile Stickers
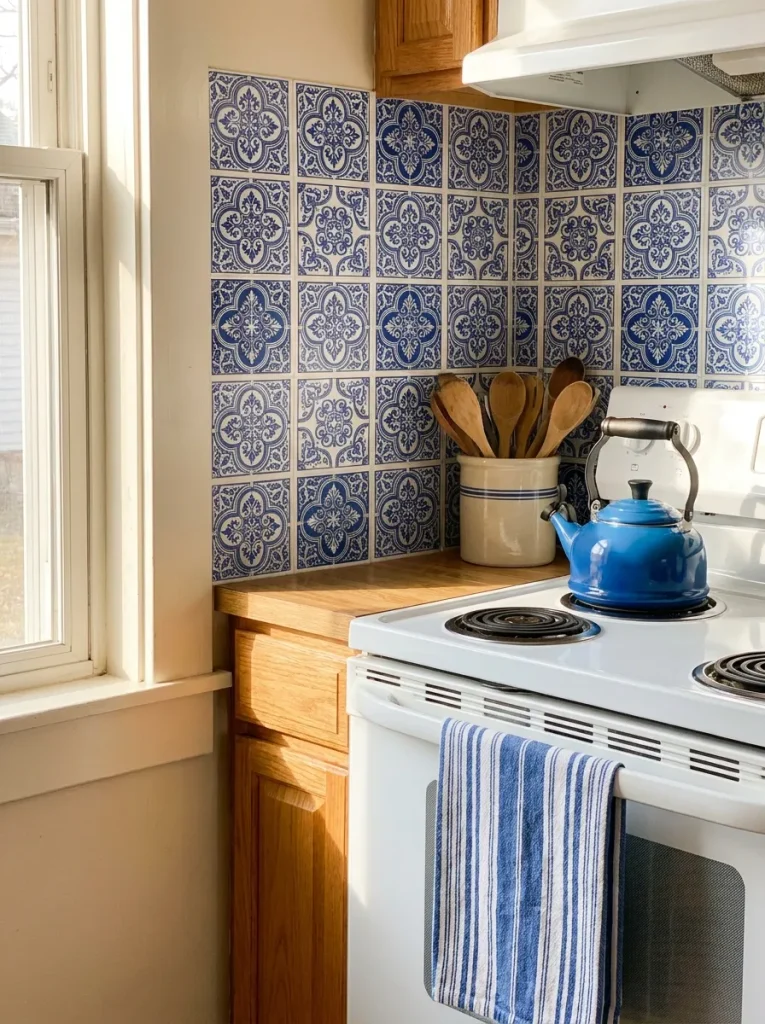
Stuck with small beige squares from decades ago? Tile stickers go right over the old tile, so nothing comes off the wall.
Here’s why they look so real. The original grout lines stay visible around each sticker, so your eye sees real tile depth and real grout with a fresh pattern on top.
Good to know before you order:
- Measure one existing tile exactly. Stickers come in set sizes and need to match.
- They grip best on smooth, glossy tile, not rough or textured surfaces.
- Clean off kitchen grease with a degreaser first, then let it dry fully.
Plan on one evening for a small wall, and a tired thumb from all the smoothing.
Plain beige squares with yellowed grout. Sturdy, but they make the whole kitchen look older than it is.
Same tiles and same grout lines, now covered in a blue and white pattern that looks hand painted. Peel them off when you move.
7. Go Bold With Cement Tile Style Peel and Stick
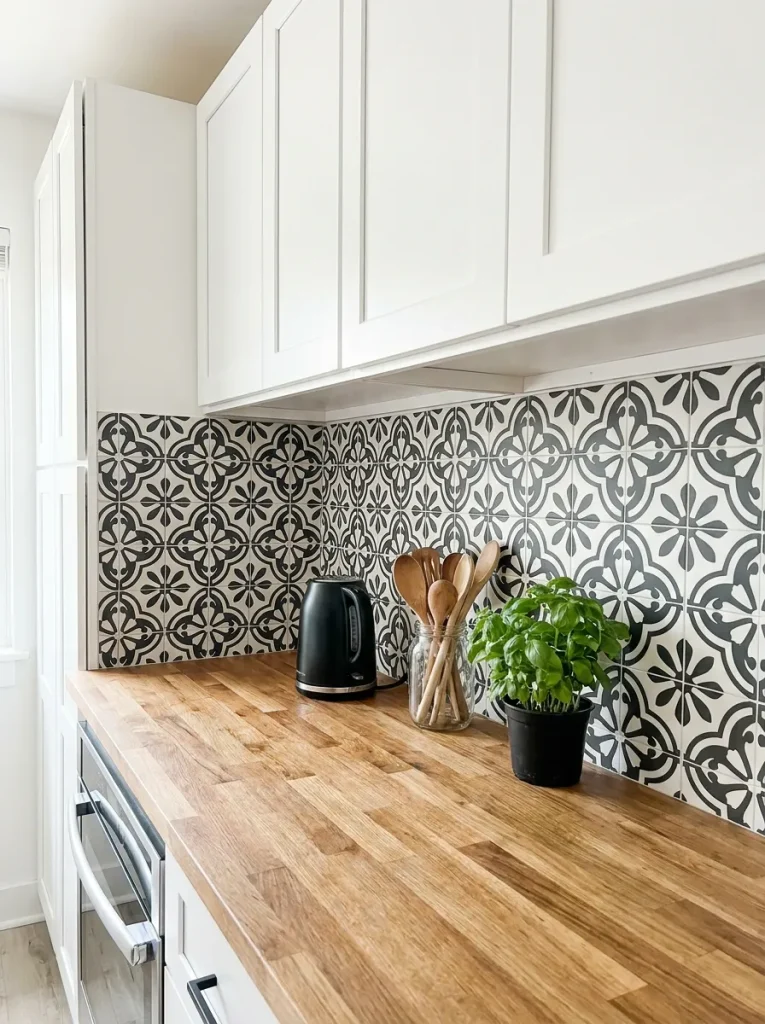
Patterned cement tile used to mean a contractor and a big budget. Now vinyl peel and stick squares copy those printed designs closely, and the matte versions read a lot like real concrete tile.
A busy pattern is also forgiving. Small splatters and water spots blend right in, which matters in a kitchen you actually cook in.
Watch the rest of the room, though. With a patterned backsplash, plain cabinets and solid counters keep things from feeling crowded. Pull one or two colors from the tile for towels or a rug and stop there.
8. Protect Removable Wallpaper With a Clear Acrylic Panel
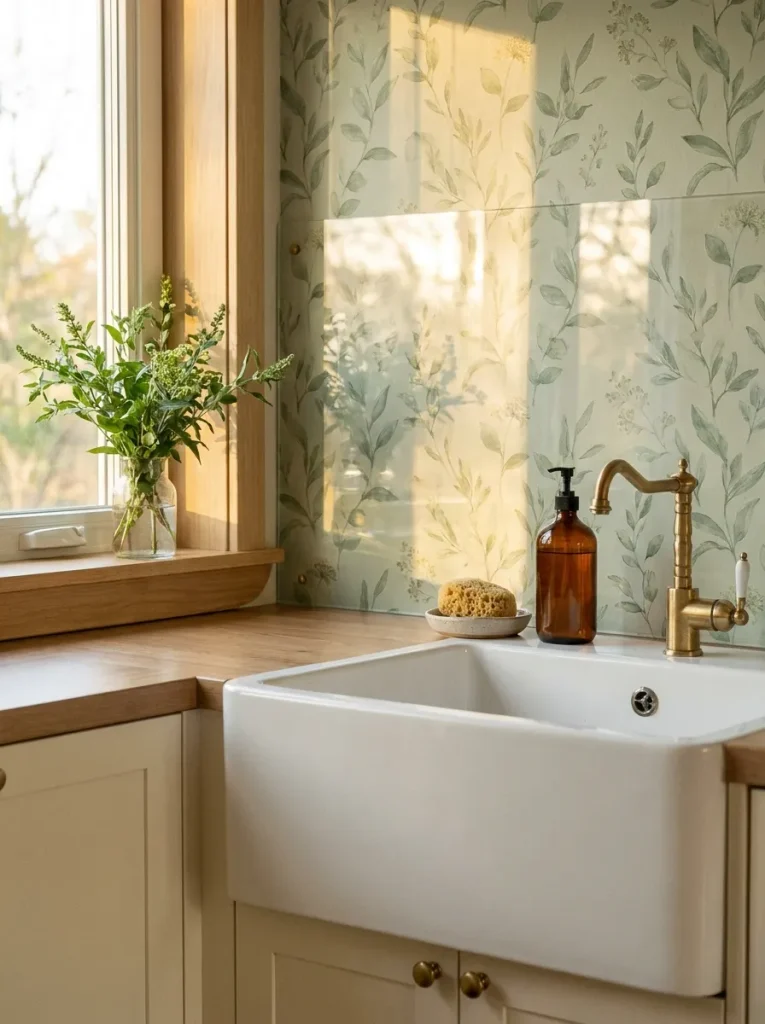
Wallpaper behind a sink sounds like a bad idea. A clear acrylic panel fixes that.
The wallpaper brings the color and pattern. The clear sheet in front takes the water, grease, and fingerprints, and it wipes clean in seconds. From a few feet away the panel nearly disappears, and the wall just looks glossy and finished.
Keep this one away from the stove. Acrylic can warp near high heat, so behind a range you’d want tempered glass instead.
If you love the wallpaper route, I shared a tile-look wallpaper for a rental backsplash in my roundup of peel and stick ideas for every room.
Hang the removable wallpaper first and give it a day to settle.
Ask the store to cut the acrylic to size. Plan the panel to stop short of outlets, or cut openings with an acrylic scoring knife.
Mount it with clear removable mounting strips rated for the panel’s weight.
Peel off the protective film last, so the panel stays scratch free while you work.
9. Choose a Small Hexagon Mosaic in Matte Sage
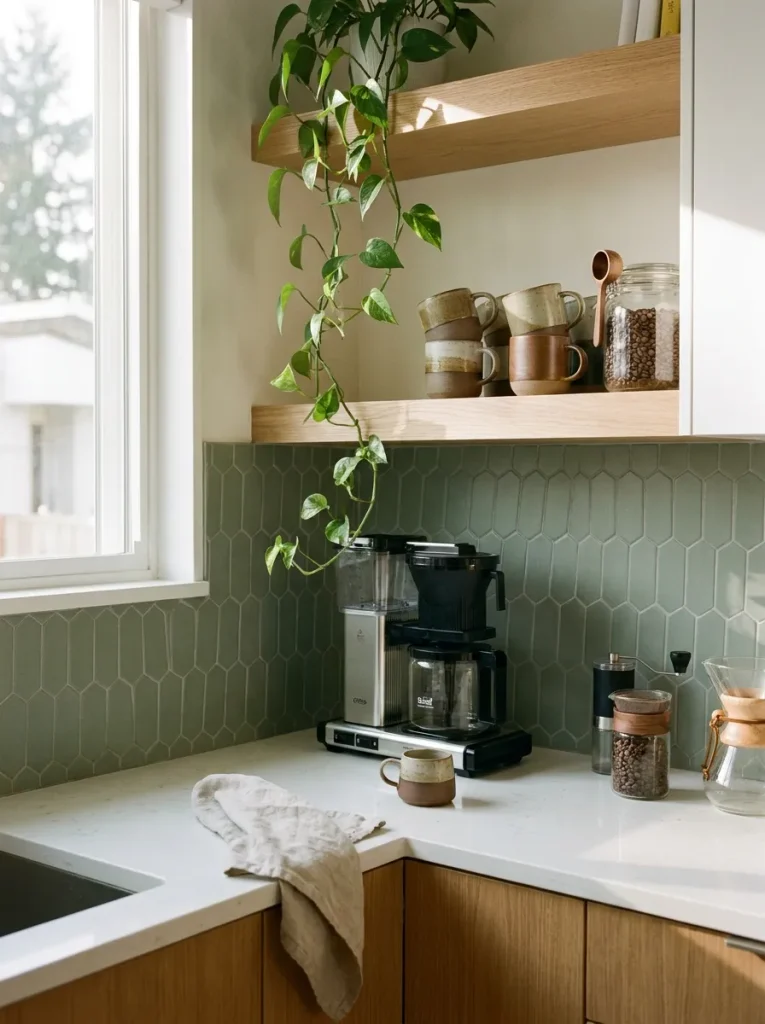
Small tiles are the secret to hiding seams. A hexagon mosaic has so many grout lines that the edges between sheets disappear into the pattern. Matte sage green reads calm and modern, and the flat finish hides the plastic shine some peel and stick tiles have.
Where small hex tile looks best:
- A coffee or tea station where you want one special corner
- The narrow strip of wall between a counter and a window
- A bathroom vanity wall, where splashes are light
It works with white cabinets and wood cabinets alike, which makes it an easy pick for a rental you didn’t design.
💡 Quick Tip
Dry fit every sheet on the wall with painter’s tape before you peel off the backing. Hexagon edges zigzag, so checking the fit first saves you from crooked rows and wasted sheets.
10. Lay Terracotta Herringbone for a Custom Tile Look
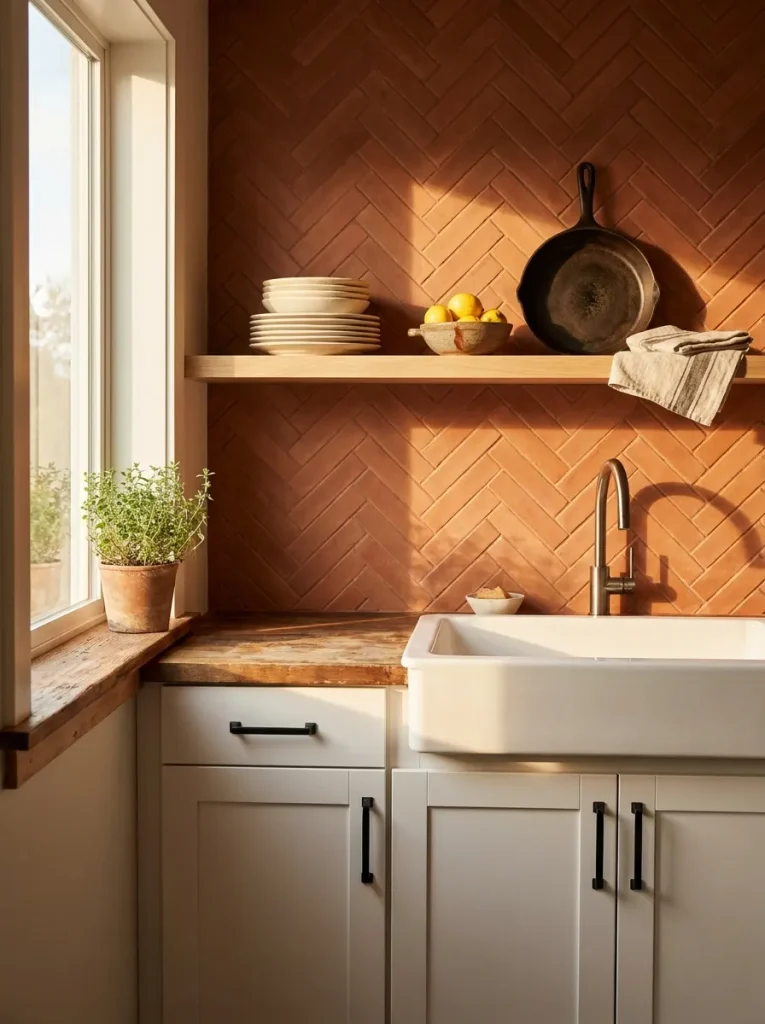
Why does herringbone look so expensive? Every tile sits at an angle, and laying it by hand takes real skill and time. Peel and stick sheets come with the zigzag already set, so you just line up the edges.
A warm terracotta or clay tone keeps the pattern feeling earthy instead of busy. It sits nicely with white cabinets, black hardware, and plenty of wood.
Center the first point right over the sink. That’s where everyone looks first.
Order a few extra sheets. Angled patterns leave more cut off waste at the ends.
Find the center of the wall and work outward so both ends match.
Starting in a corner. It can leave a thin sliver of pattern on one side.
Sticking sheets straight from the box. Lay them out first to check the clay tones match.
Conclusion
A backsplash is one of the smallest areas in a kitchen, but it changes how the whole room feels. Start with the look that fits the cabinets you already have. Warm oak looks great with dusty pink or terracotta. White cabinets can handle a bold pattern or a marble slab. And if your wall is short, a single stretch behind the sink is plenty.
Backsplash done? These small kitchen ideas cover the rest of the room.
Whichever of these temporary backsplash ideas you pick, take your time with the prep and the first row. Those two steps decide whether it looks permanent.
Save this pin to your kitchen board so it’s ready for your next weekend project.
A new backsplash goes even further alongside a few more renter-friendly kitchen upgrades you can take with you.
📌 Good To Know
Before you cover a whole wall, stick one test piece in a hidden spot and peel it off after a few days. If it lifts paint, try a different product or check with your landlord first.

