
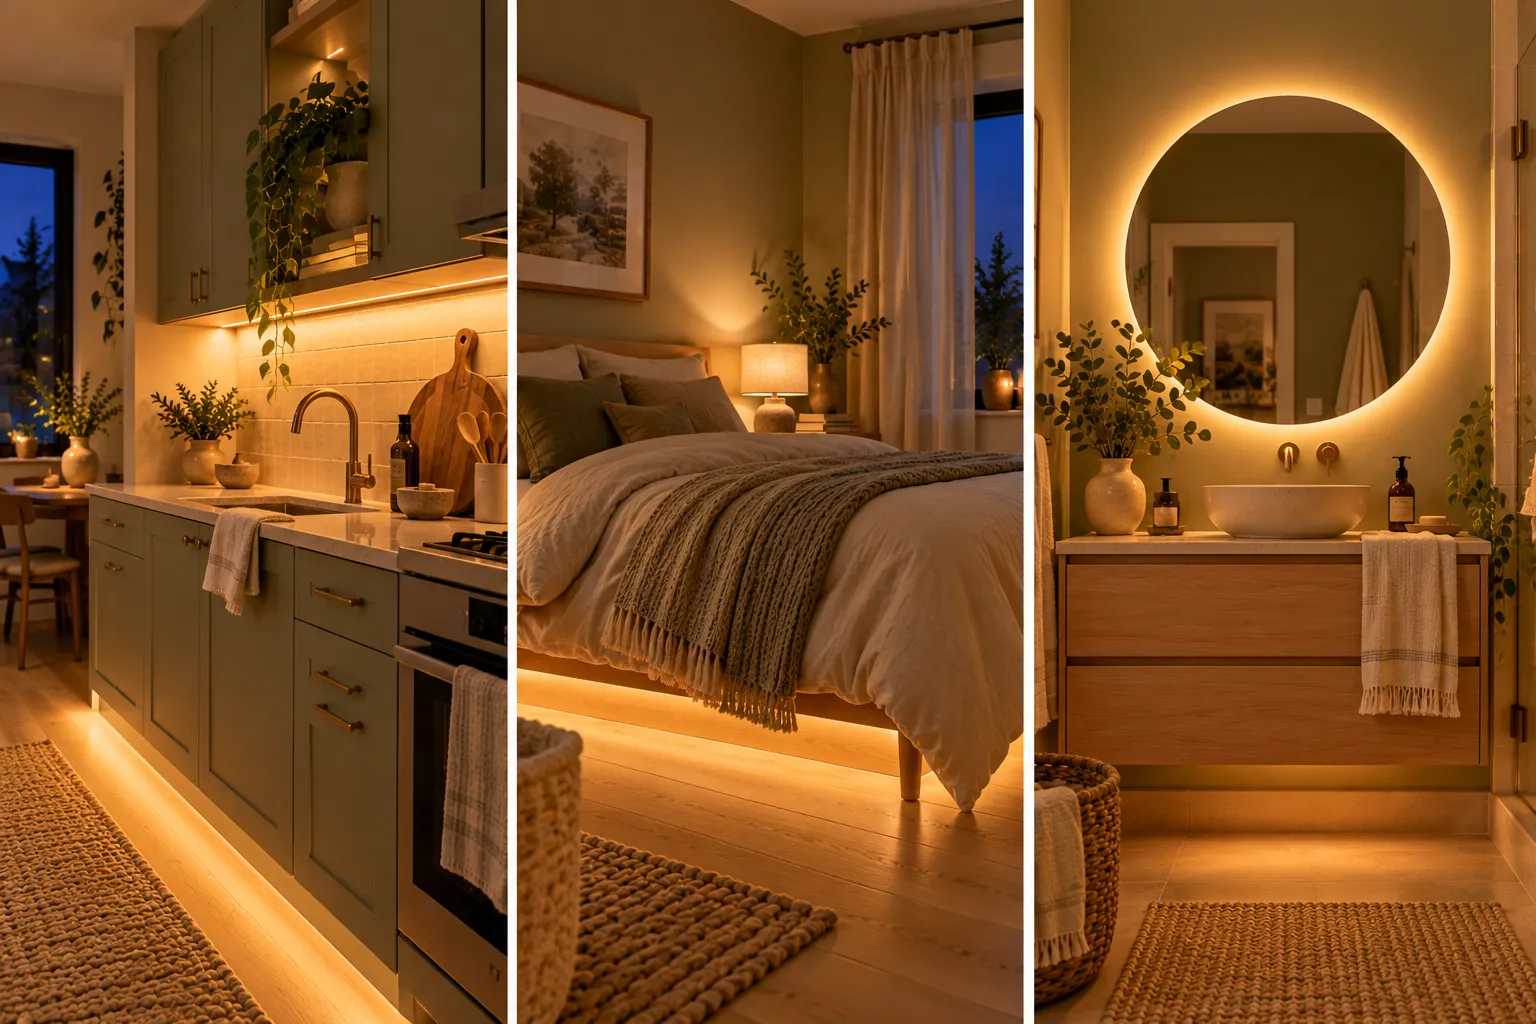
LED strip lights have a reputation problem. Most of us have seen it: the purple glow running around a ceiling, the dotted line of bulbs stuck to a wall, and the cord dangling down to an outlet behind the bed. It looks fun at nineteen. In a grown up apartment, it looks like you forgot to move out of the dorm.
The lights are not the issue. The way they get installed is. Bright cool colors, visible strips, and lights that shine at you instead of onto something are what make them look cheap.
Used well, the same roll of lights can make a small apartment feel warmer and bigger at night. A soft glow under the cabinets, a wash of light on the ceiling, or a dim line under the bed does what a single overhead fixture never will. It spreads light around the room in soft layers, the way nice hotels and restaurants do.
These LED strip lighting ideas are renter friendly, cheap to try, and easy to undo when you move. Start with the first two, since they fix the dorm look everywhere else.
1. Pick Warm White and Retire the Color-Changing Remote
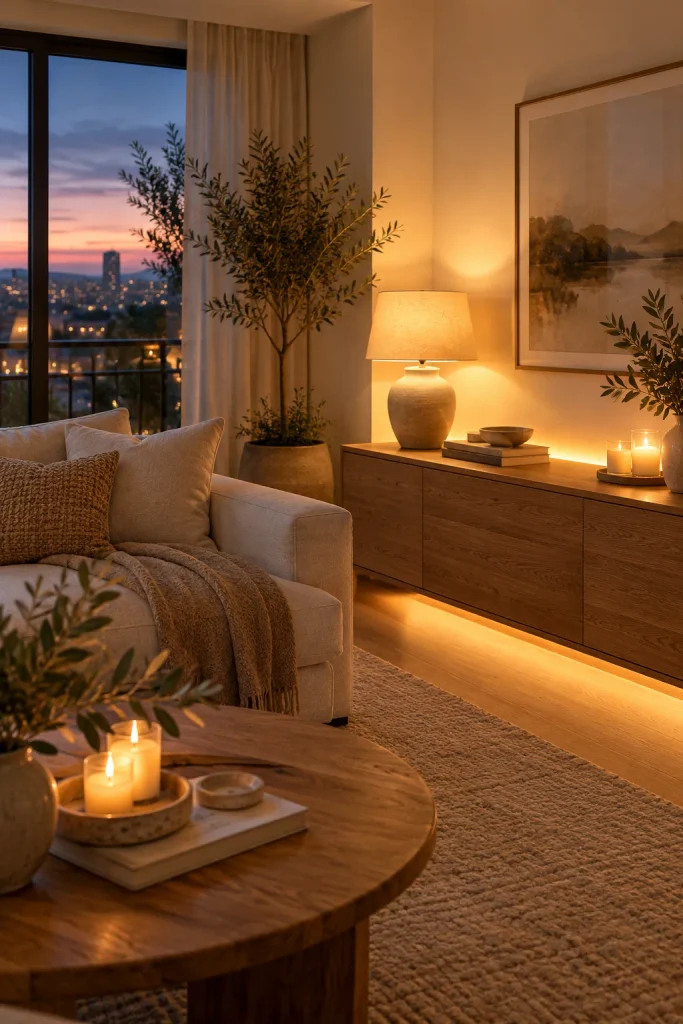
Here’s the rule that fixes most of the dorm look: warm white only.
Warm white wins for a reason, and this guide explains the best bulb color temperature for cozy lighting.
Color-changing strips come with a remote full of reds, blues, and a rainbow fade mode. They’re fun for one party. Day to day, a purple glow makes a living room feel like the line outside a club. Warm white looks like lamplight, so it blends in with the lamps and candles you already have.
When you shop, check the color temperature on the box. Lower numbers look warm and golden. Higher numbers look white and a little blue, closer to an office.
Already own a color-changing strip? Mix the warmest amber white the remote allows. It won’t look as clean as a true warm white strip, but it beats purple. Then put the remote in a drawer.
2. Tuck Every Strip Into a Diffuser Channel So the Dots Disappear
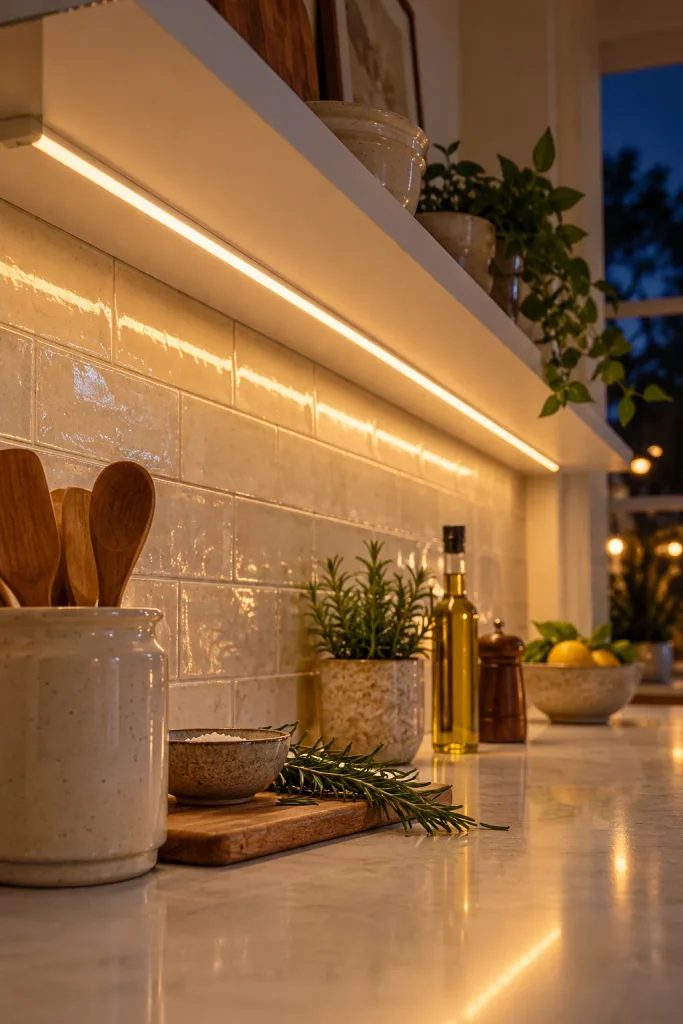
Look closely at a bare LED strip and you’ll spot the giveaway: a row of tiny bright dots, like a runway. That dotted line is what makes strip lighting read as cheap. On a glossy counter or tile wall, every dot shows up twice.
An aluminum channel with a frosted cover fixes it. The cover blurs the dots into one smooth line of light, which is the look you see in nice kitchens and hotel bathrooms.
Putting one in is simple:
- Stick or clip the channel where the light will go.
- Press the strip into the channel.
- Snap the frosted cover on top and add the end caps.
Measure the full run before you buy, so the channel covers the whole strip with no bare ends poking out.
| Bare strip | Strip in a channel | |
|---|---|---|
| What you see | A dotted line of bulbs | One smooth line of light |
| On shiny surfaces | Every dot reflects | A soft, even reflection |
| Dust and grease | Sticks to the strip | Wipes off the cover |
| Heat | Builds up on the strip | Aluminum helps it run cooler |
| Cost | Cheapest | A little more per run |
3. Mount Under-Cabinet Strips at the Front Edge, Not the Back Wall
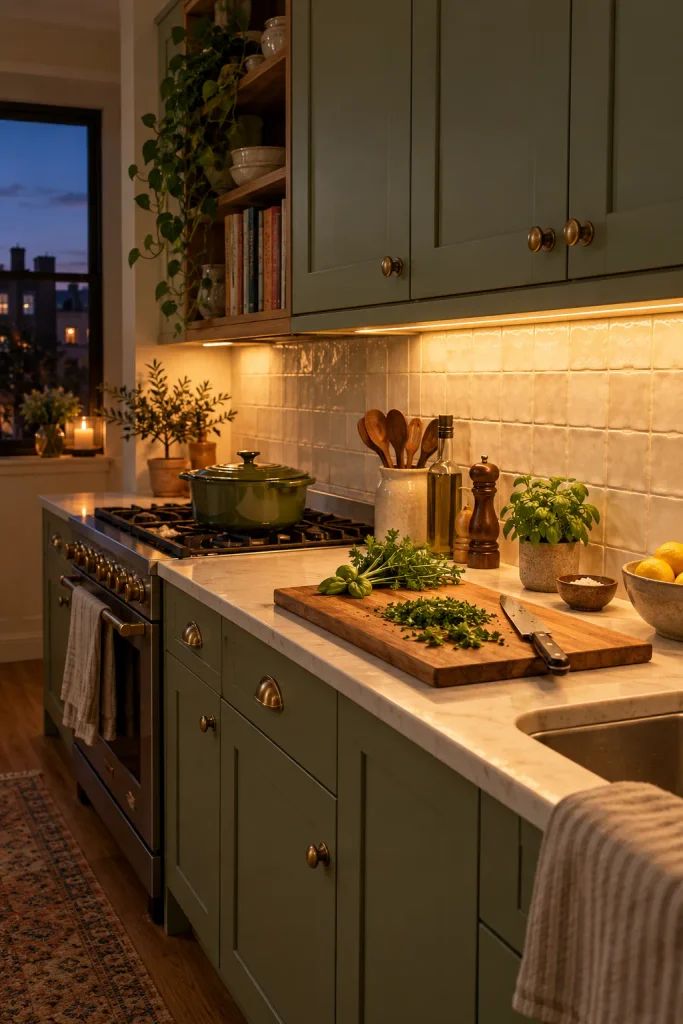
The most common under-cabinet mistake is sticking the strip against the back wall, right above the backsplash. It feels logical. But it lights the wall instead of the counter, and you’ll see every dot reflected in shiny tile.
Move it to the front edge, just behind the lip of the cabinet. The light falls onto the counter where you’re actually chopping, and the backsplash still gets a soft wash.
A few things make it look finished:
- If your cabinets have no lip, use an angled channel that points the light back toward the wall.
- Run the strip almost the full width of each cabinet, so the light doesn’t stop in a hard dark gap.
- Stick with warm white. Food looks better under it.
Strip stuck at the back, right above the backsplash. The tile glows, the counter stays shadowy, and every dot shows up in the glossy finish.
Strip moved to the front edge. Light lands on the cutting board, the backsplash gets a soft wash, and no glare bounces back at you.
4. Make Your Bed Look Like It’s Floating With a Low Underglow
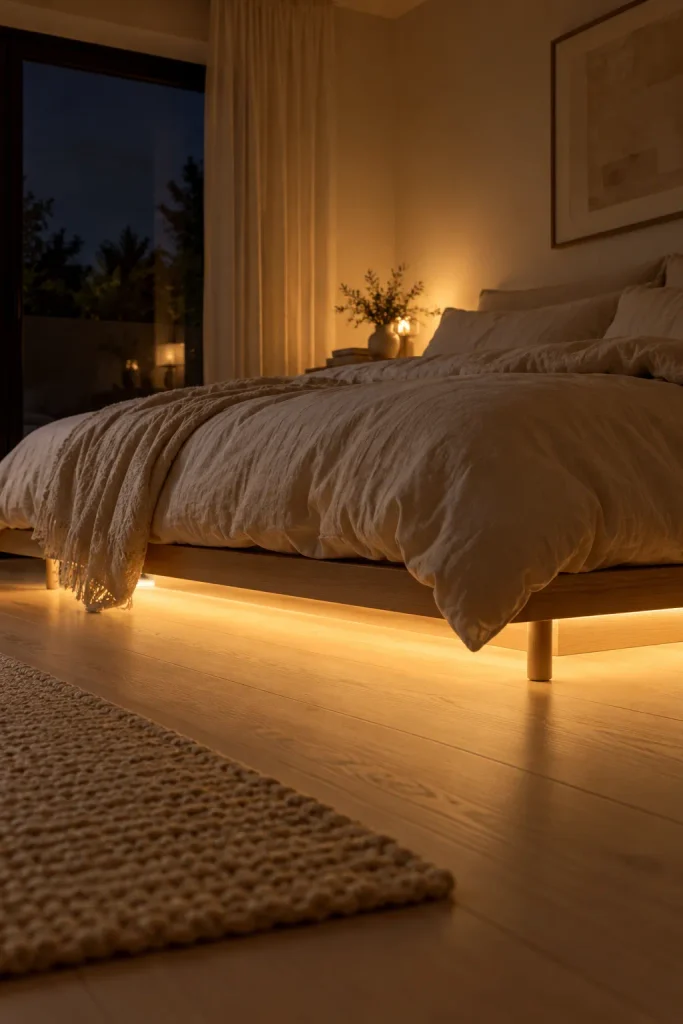
It’s 2 a.m., you need water, and the overhead light would wake everyone up, including you. A strip under the bed frame handles this quietly.
More bedside glow lives in these bedroom lighting ideas that make a small apartment feel cozy.
Run it along the underside of the frame, a few inches in from the edge, so you see the glow on the floor and never the strip itself. The bed looks like it’s hovering, which makes a small bedroom feel less crowded once the lamps are off.
Keep it dim. This is a glow, not a reading light.
It works best on frames with legs and open space underneath. A bed on a solid platform base sits too close to the floor for the light to spill out.
Wipe the underside of the frame with rubbing alcohol so the adhesive actually holds.
Stick the strip a few inches in from the edge, starting on the side closest to the outlet.
Plug it into a motion sensor or dimmer so it glows low, and only when you need it.
5. Light the Wall Behind the TV, Not the Room Around It
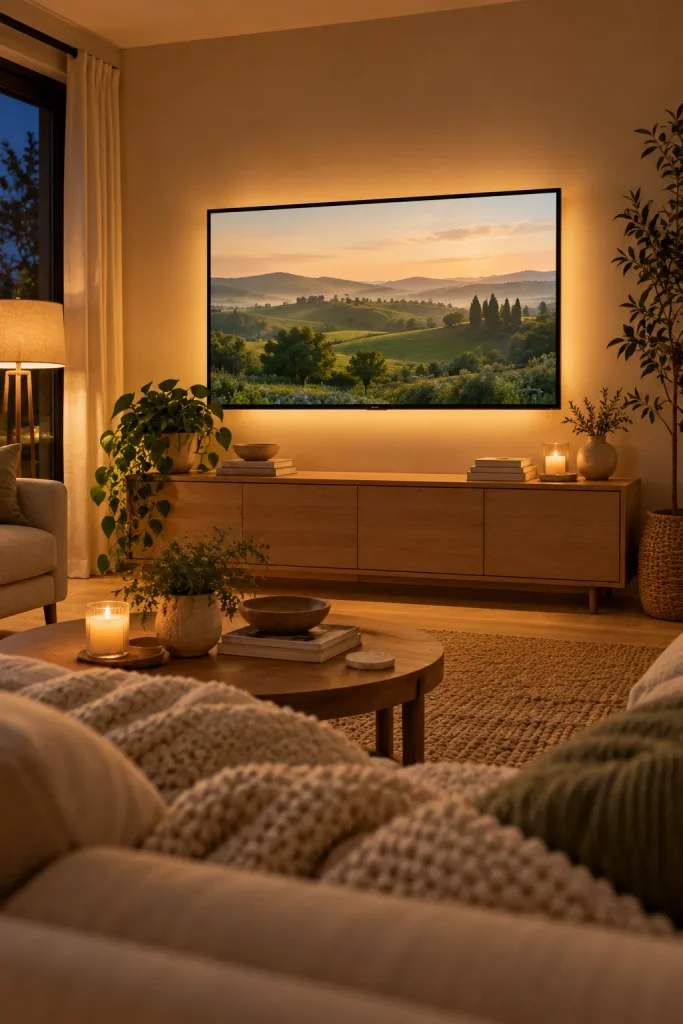
Watching a bright screen in a pitch dark room is harder on the eyes than it needs to be. A soft glow on the wall behind the TV takes the edge off that contrast, and it makes the room feel calm instead of cave dark.
Placement is everything here. Stick the strip on the back of the TV, a couple of inches in from the edges, so the light hits the wall and the strip never peeks out. Leave the console and the rest of the room alone.
Many TVs have a USB port on the back that can power a USB strip, which means one less cord. Some of those ports shut off with the TV, so the glow turns on and off with the screen.
6. Wash the Ceiling From the Top of a Tall Wardrobe or Bookcase
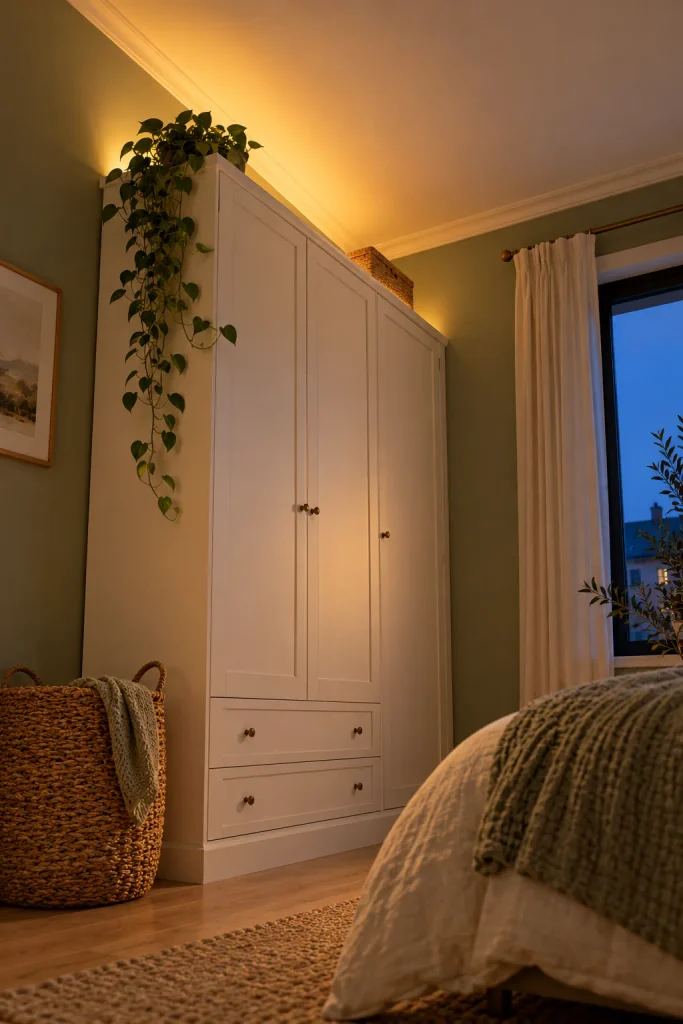
The top of a wardrobe is usually where suitcases and dust go to hide. It’s also one of the best spots in a small apartment for strip lighting.
Lay the strip along the back edge of the top, facing up. The light hits the ceiling and spreads out softly, which makes a low ceiling feel a bit higher and a small room feel wider at night.
This is the grown up version of the dorm move of running lights around the whole ceiling. You get the same glow, and nobody ever sees the strip.
It works on anything tall: a wardrobe, a bookcase, or a row of kitchen cabinets that stops short of the ceiling. The more space between the top and the ceiling, the softer the spread.
💡 Quick Tip
Clear off the top and wipe the dust before you stick anything down. Uplight shows whatever is sitting up there, so a stack of boxes turns into a lumpy shadow across the ceiling.
7. Line the Underside of Open Shelves to Spotlight What’s on Them
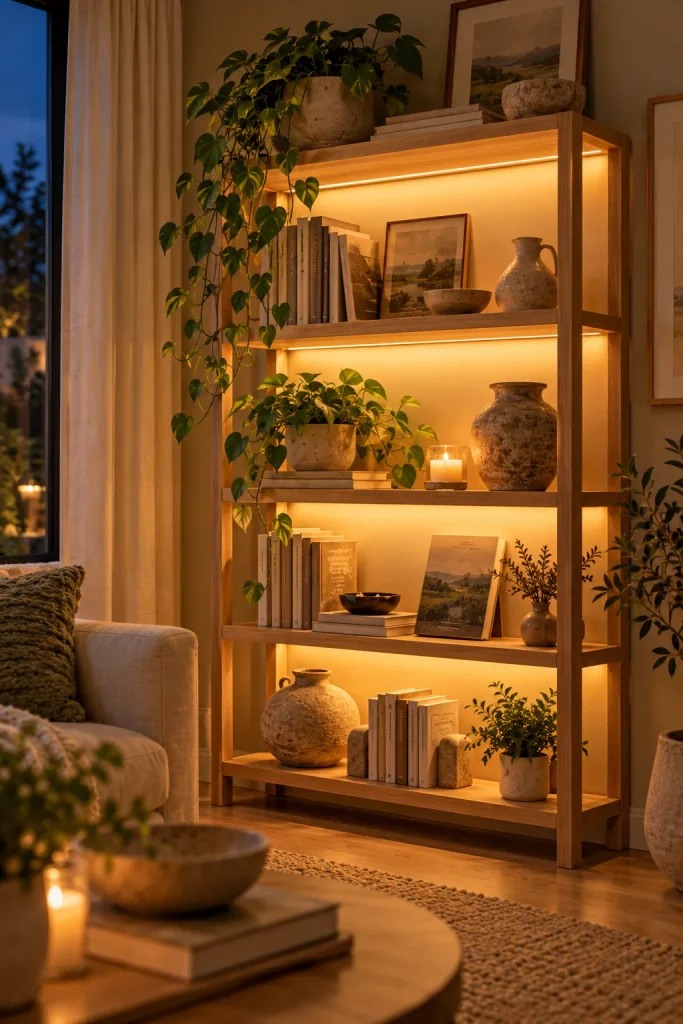
Lit shelves make a plain flat pack bookcase look built in. The glow lands on whatever you’ve put there, so a few books and a trailing plant turn into a little display.
Strips are only one option, so see more lighting ideas that need no wiring at all.
Stick the strip on the underside of each shelf, near the front edge, so it shines down on the shelf below. Inside a channel, it hides behind the shelf lip and you only see the light.
Bring the wire down a back corner of the unit, where a book or the side panel covers it.
Edit the shelves before you light them. Light makes clutter look more cluttered.
Light the shelves holding plants, pottery, or books with the covers facing out.
Place the strip at the front edge so it shines down, not out at you.
Run the wire down one back corner and nowhere else.
Lighting every shelf of a packed bookcase.
Strips up the sides of the unit, which looks like a vending machine.
Bare strips under glass shelves, where every dot shows through.
8. Add a Toe-Kick Glow Under the Kitchen Cabinets or Bathroom Vanity
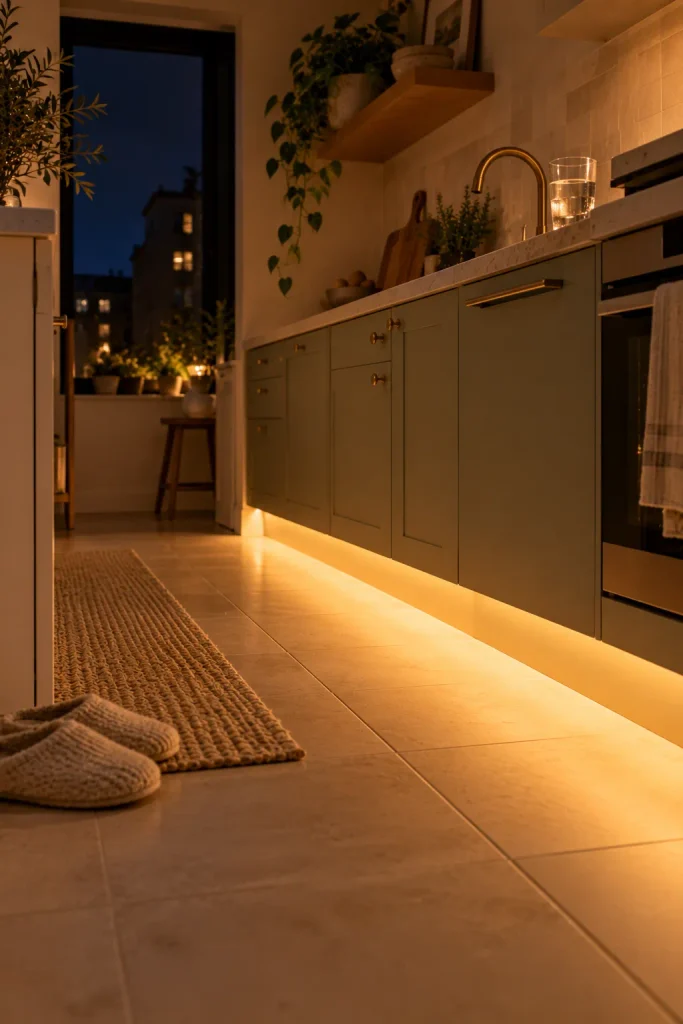
Start at the floor. The thin recessed space at the bottom of kitchen cabinets, called the toe kick, is a great hiding place for lights.
A strip tucked up under that edge throws a low glow across the floor. At night, it’s enough light to grab a glass of water or find the sink without blinding yourself. During the day, you’d never know it’s there.
It’s also one of the most renter friendly spots in the apartment. Nobody looks under there, so any adhesive left behind stays out of sight.
Bathroom vanities work the same way. A low glow under the sink makes a small bathroom feel calm instead of harsh at midnight.
What to grab first
9. Give a Bathroom Mirror a Halo Without Touching the Wiring
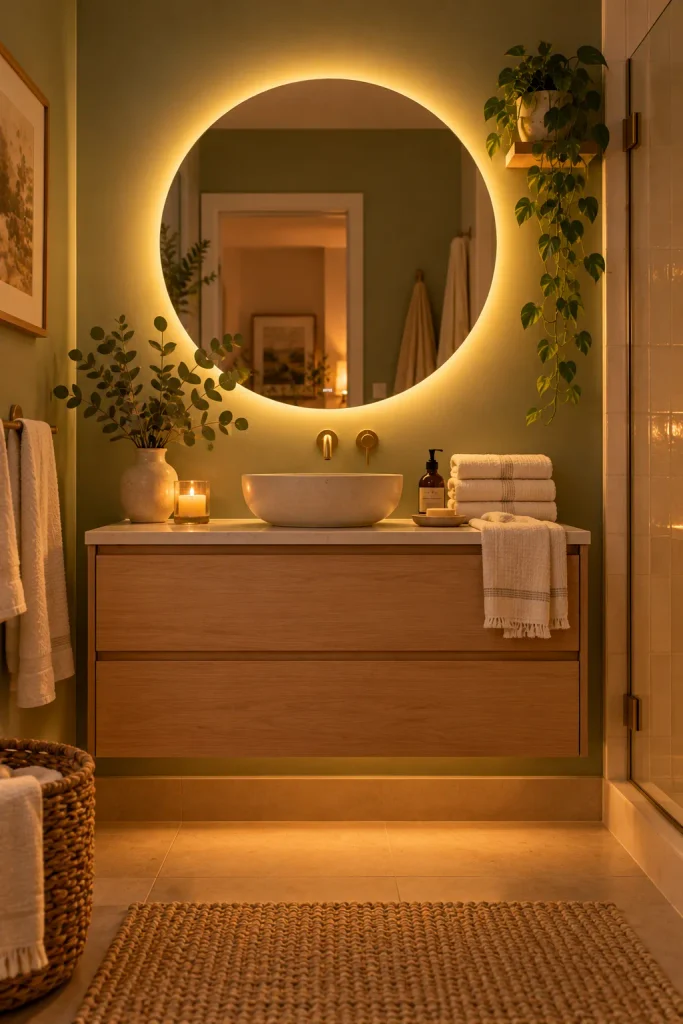
Backlit mirrors in hotel bathrooms look like they need an electrician. They don’t. The glow comes from a strip on the back of the mirror, and you can add one to a mirror you already own.
Stick the strip on the back, a couple of inches in from the edges. Then give the mirror a little space from the wall. Felt bumpers or small spacer blocks on the back corners do it, and the light spreads around the frame like a halo.
Two rules for bathrooms:
- Pick a strip rated for damp rooms.
- Keep the plug and power box well away from the sink and shower.
No outlet nearby? A battery powered strip works fine for a mirror you only light at night.
10. Hide a Strip Above the Curtains to Fake a Brighter Window
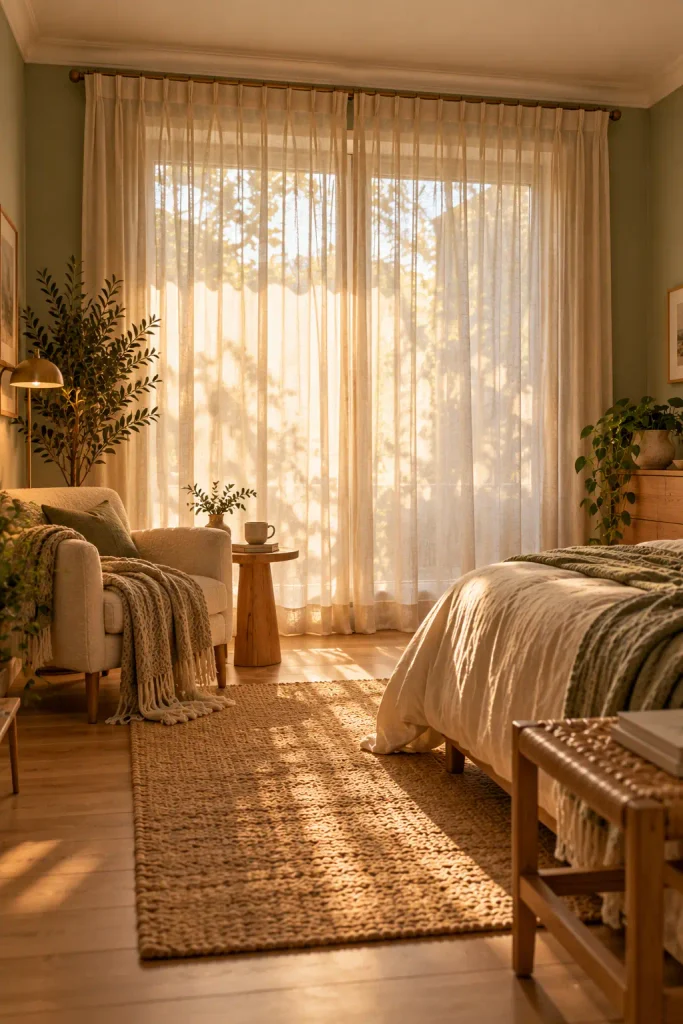
Some apartment windows never look bright, even at noon. Ground floor units, windows facing a brick wall, the bedroom that gets sun for an hour a day.
A strip hidden above the curtains helps. Stick it on top of the curtain rod or on the wall just above the window, facing down behind the curtain. When it’s on, the fabric glows like there’s sun on the other side.
This is the one spot where a slightly whiter light can work, since daylight isn’t golden. Soft white is a safe middle.
Keep the strip and power box off the fabric. LEDs run cool, but there’s no reason to test it.
📌 Good To Know
This works with sheer, linen, or light cotton curtains. Blackout panels stop the glow completely, so hang a lighter panel in front of them or save this idea for another window.
11. Use Motion-Sensor Strips Inside Closets and Cabinets
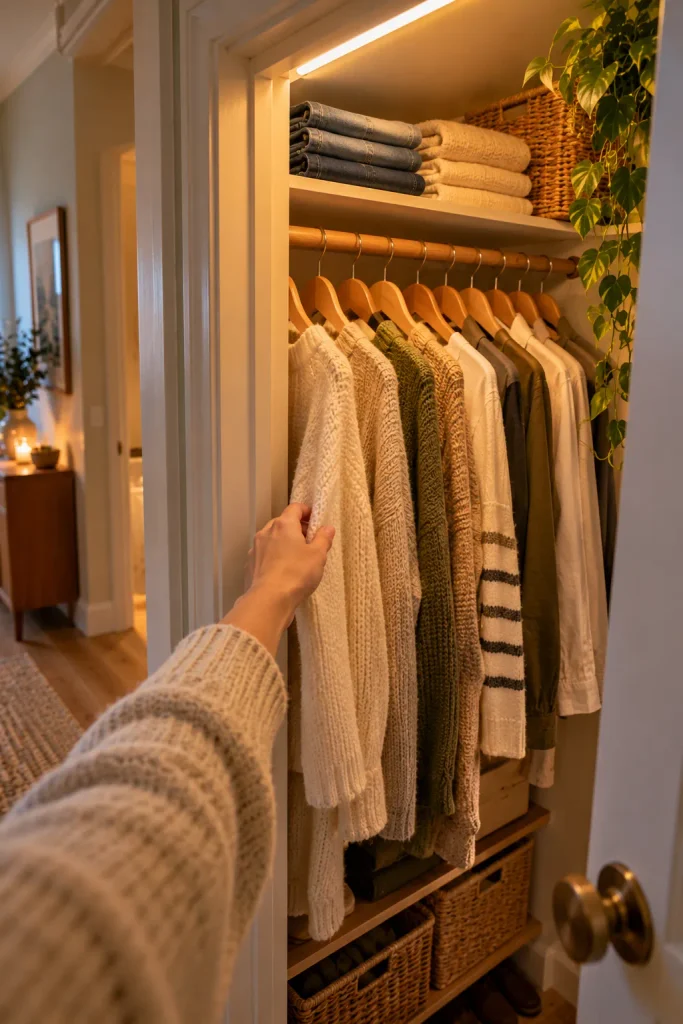
A light that turns on the moment you open a door feels like a small luxury, and it costs very little to add. Battery powered motion strips stick inside closets and cabinets, with no outlet needed.
Mount the strip along the inside top of the door frame, facing in. That way it lights the hanging clothes or the back of the shelf instead of shining into your eyes.
A couple of habits keep them working:
- Pick a kind that switches off on its own after a short time.
- Recharge or swap batteries as soon as the light starts to dim.
This is one spot where cool or neutral white is fine. You’re checking whether your navy and black socks match, not setting a mood.
12. Backlight a Headboard Panel for a Hotel-Style Bed Wall
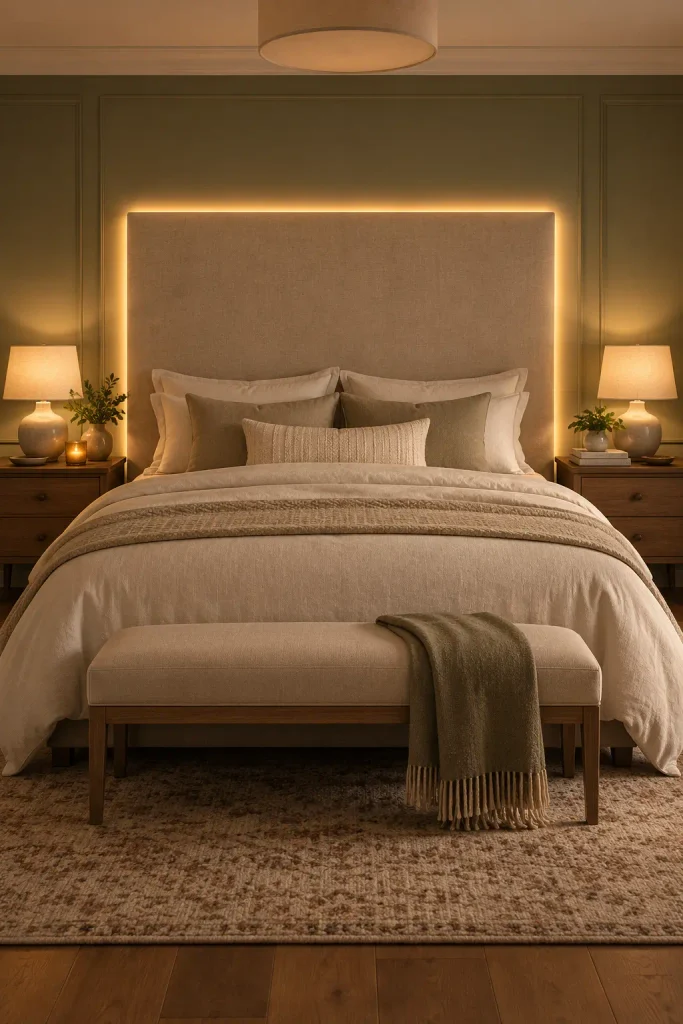
Stick a strip straight on the wall behind your bed and you get a bright line, plus a sticky mess waiting for move out day. Put that same strip on the back of a headboard panel and you get the hotel look instead.
For long, dark evenings, these cozy winter lighting ideas for small apartments pair nicely with strips.
The panel can be simple: a sheet of plywood painted to match the room, or one wrapped in fabric and batting. Stick the strip on the back, a few inches in from every edge. Add small wood blocks to the back corners, then lean the panel against the wall behind the mattress so the light has room to spread.
The glow wraps around the panel and turns the bed wall into the focal point of the room.
Make the panel a little wider than the bed so the light frames it evenly.
| Strip on the wall | Strip on a panel | |
|---|---|---|
| The look | A bright line on bare paint | A soft halo around a solid shape |
| Where the adhesive goes | On your wall | On the back of the panel |
| Move out day | Risk of peeled paint | The panel comes with you |
| Effort | A few minutes | One weekend afternoon |
13. Put Every Strip on a Dimmer or Smart Plug Schedule
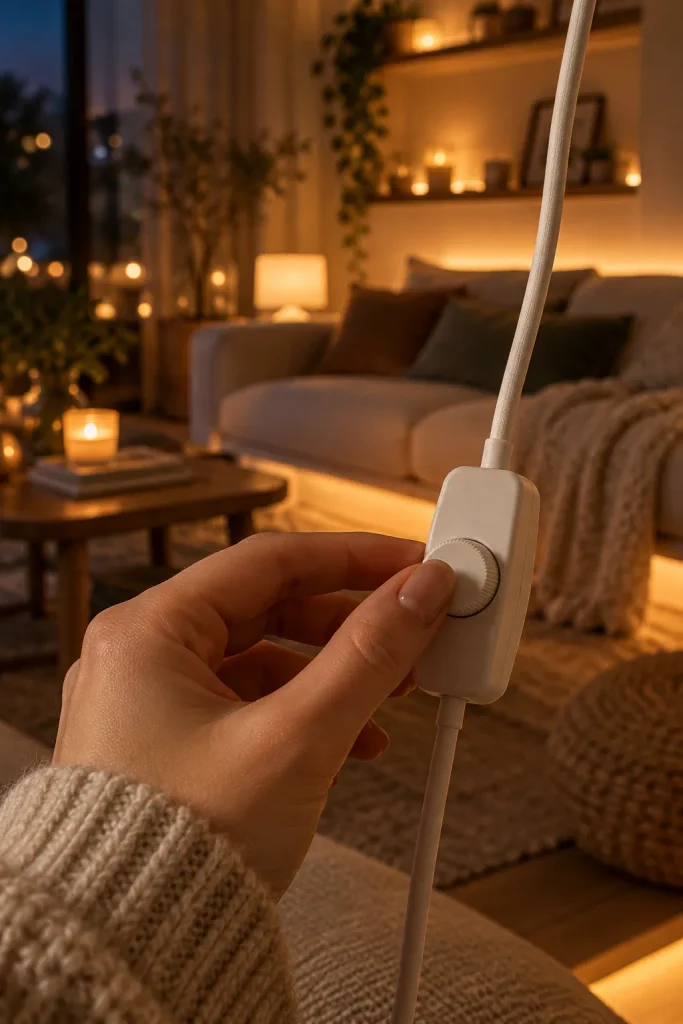
The strips that look the most grown up are almost never running at full brightness.
At full power, even warm white strips glare and wash out the room. Dimmed down, they become background light, the kind people only notice when it’s gone.
Two easy ways to get there:
- An inline dimmer on the cord, so you set the level once and leave it.
- A smart plug with a schedule, so the strips come on around sunset and switch off at bedtime.
One catch: a smart plug only switches the power. Check that your strip remembers its brightness after being unplugged. Many do, but some reset to full every time.
If you can see where the light comes from, or it’s bright enough to read by, it’s too much. Hide the strip and dim it until it fades into the background.
14. Plan Cords and Mounting Before You Peel the First Strip
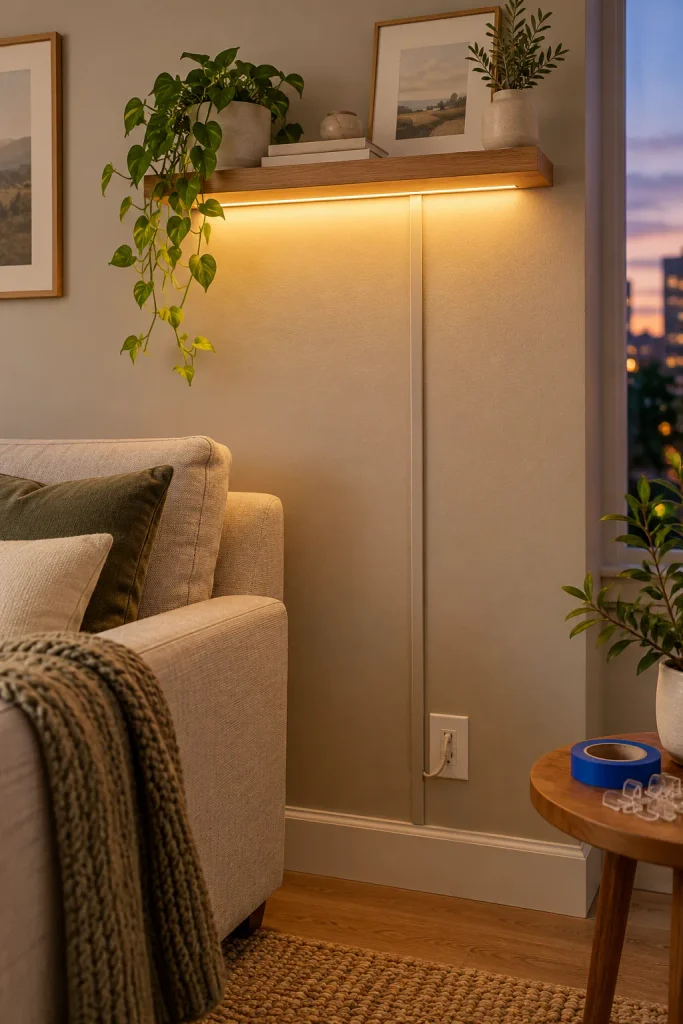
Hold the strip in place with painter’s tape and leave it there for one evening before you peel any backing. Turn it on after dark. You’ll see right away whether the dots show, whether the light hits the right spot, and whether the cord has an ugly path to the outlet.
For tidy wiring, here’s how to hide cords in an apartment so nothing dangles.
That last part matters most. A neat strip with a cord hanging down the middle of a wall still looks like a dorm.
On painted walls, skip the strip’s own sticky backing. It can pull paint off when you remove it, which is not how you want to spend move out day. Removable clips hold the strip just as well and are made to come off clean.
Renter safe supplies
Keep the Glow, Lose the Dorm
Strip lights were never the problem. Cold colors, bare dots, and lights pointed straight at your eyes were. Fix those three things and the same cheap roll of LEDs starts doing real work in a small apartment.
You don’t need to do all fourteen. Pick one spot that bugs you at night, maybe the dark counter or the closet you dig through with your phone, and start there. Warm white, hidden, and dimmed is the whole formula.
The best LED strip lighting ideas are the ones nobody notices as LED strips. They just notice your place feels nicer after dark.
Save this list for the next time you’re standing in the lighting aisle.

