
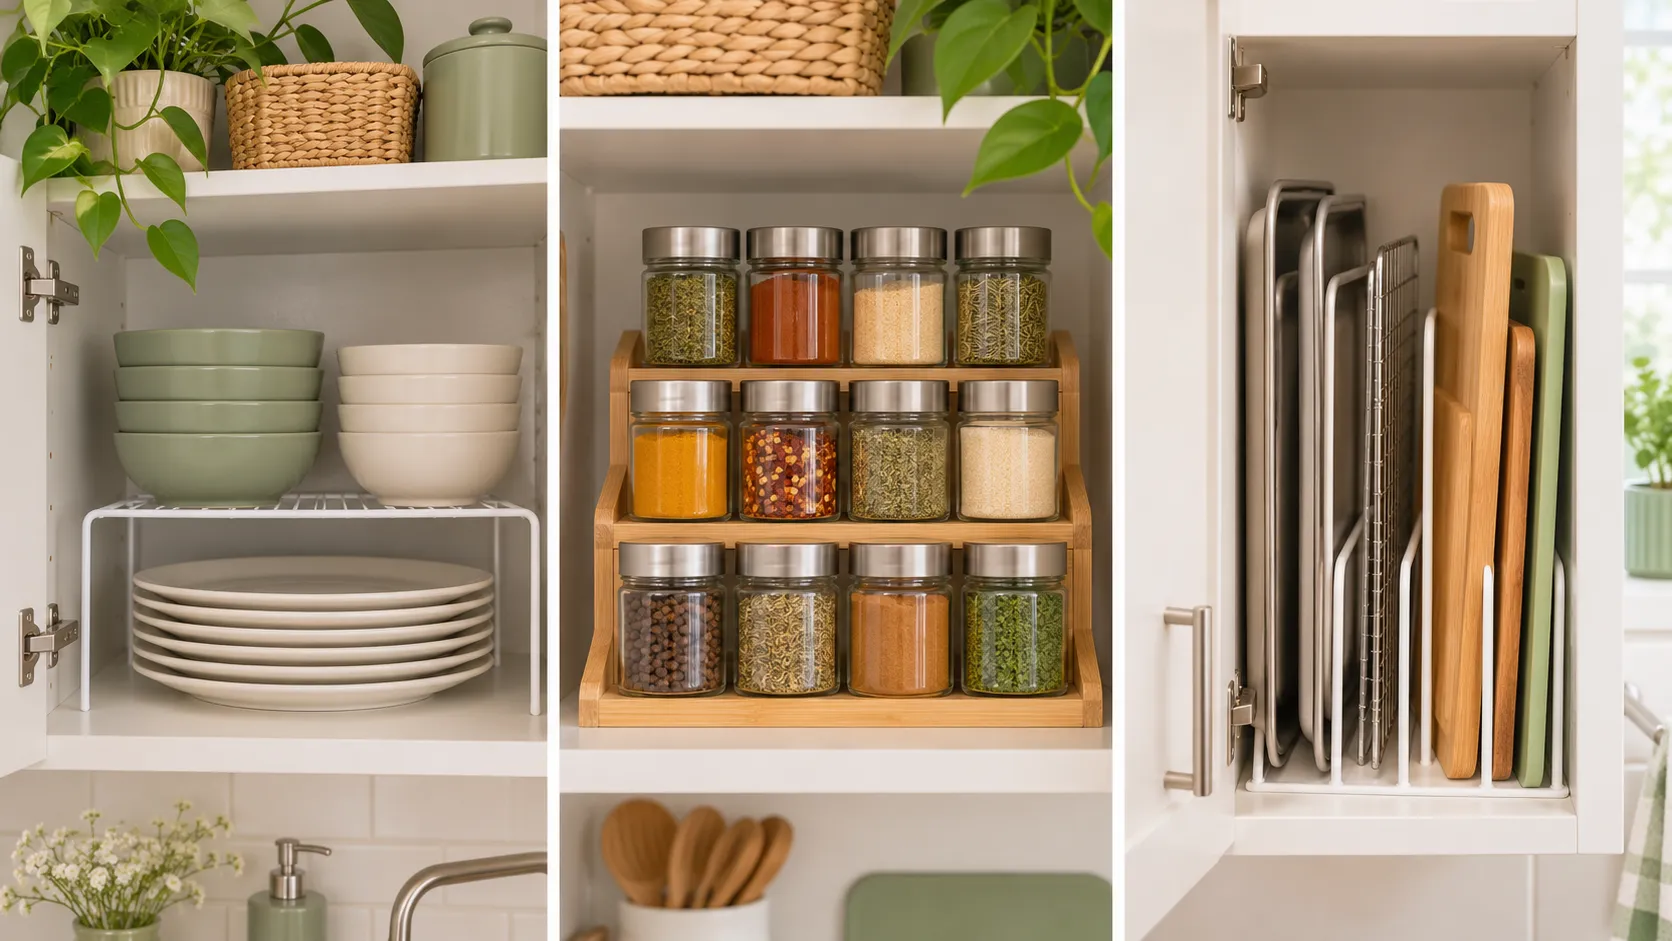
Your cabinets are probably not too small. Some spots are full of empty air, and others are packed with too much stuff.
That’s the part most advice skips. It tells you to buy matching bins and start fresh. That’s hard when you rent, cook most nights, and have nowhere to set things down while you sort. So the plates stay stacked up to the next shelf. The pot lids slide out every time you open the door. And the corner cabinet turns into the place colanders go to be forgotten.
These tiny kitchen organization ideas work with the cabinets you already have. Almost nothing here needs power tools or a landlord’s sign-off. Most fixes take less than an afternoon, and a few use things already sitting in your kitchen.
Start with the cabinet that bugs you most. You don’t need to do all fifteen at once. The first two or three will free up more room than you’d guess.
1. Empty One Cabinet All the Way Before You Buy a Single Organizer
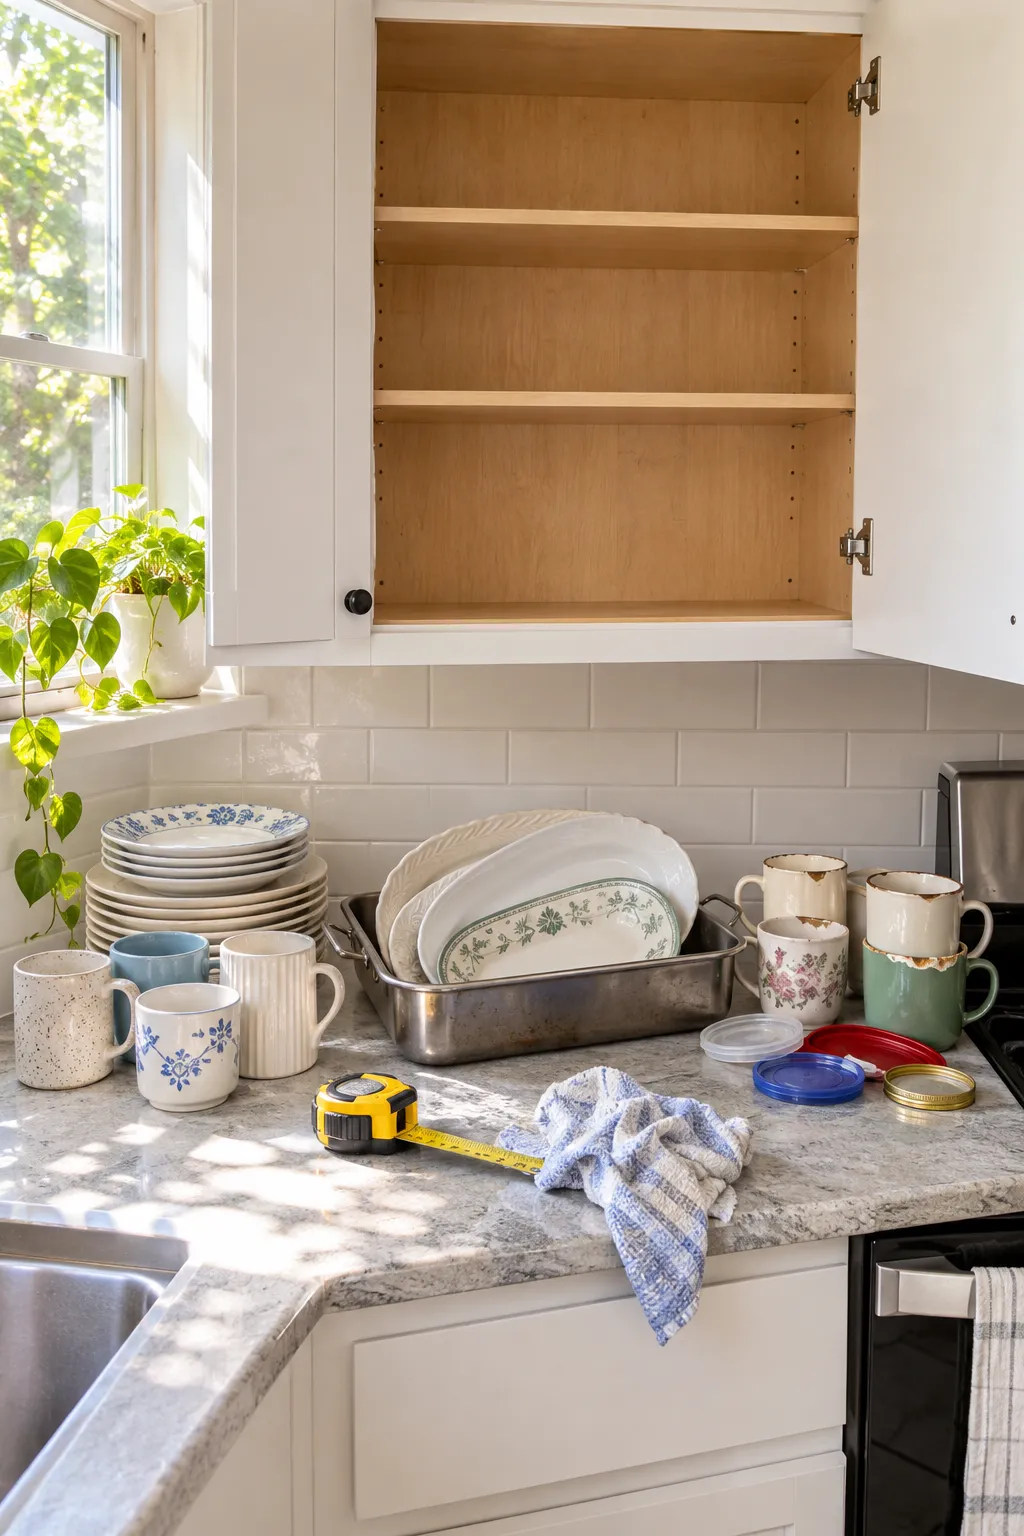
The usual move is to buy bins first and figure out what goes in them later. That’s how you end up with organizers that don’t fit the shelf and still don’t fix anything.
Pick one cabinet and empty it completely, down to the takeout menu stuck in the back. Wipe the shelf. Then sort everything on the counter into keep, move, and let go. Use one question for every item: did I use this in the last month?
Only the keep pile goes back in.
Before you shop for anything, measure the empty shelf: its width, its depth, and the gap up to the next shelf.
2. Add a Shelf Riser to Use the Empty Air Above Your Plates
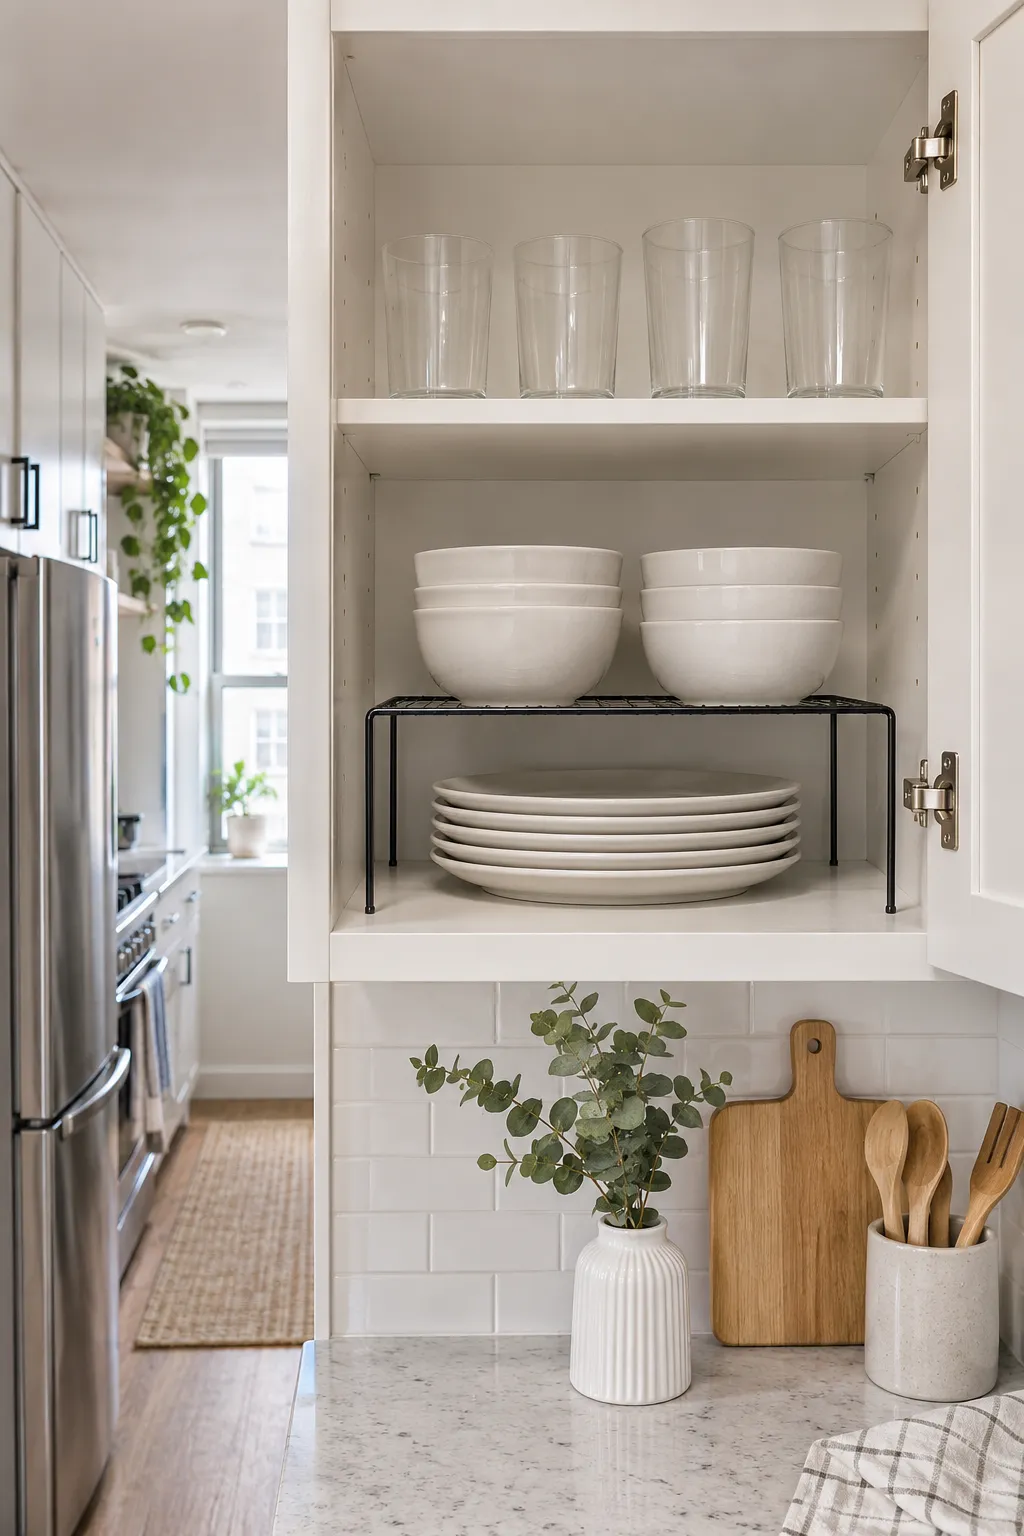
Open the dish cabinet and look at the space above your plates. In most kitchens there’s half a shelf of empty air sitting over a stack that’s only a few inches tall.
A wire shelf riser turns that one shelf into two. Dinner plates stay underneath. The top level holds the smaller things that used to get piled on top of them:
- Side plates and saucers
- The bowls you use every day
- Small prep bowls or ramekins
Now you can grab a bowl without lifting six plates first. That one change makes the whole cabinet feel less crowded.
💡 Quick Tip
Measure from the top of your plate stack to the shelf above before you buy. Leave about a finger’s width of space above the top layer, or bowls will scrape the shelf every time you pull one out. Risers with folding legs store flat if you move.
3. Stick a Lid Rack to the Inside of the Pot Cabinet Door
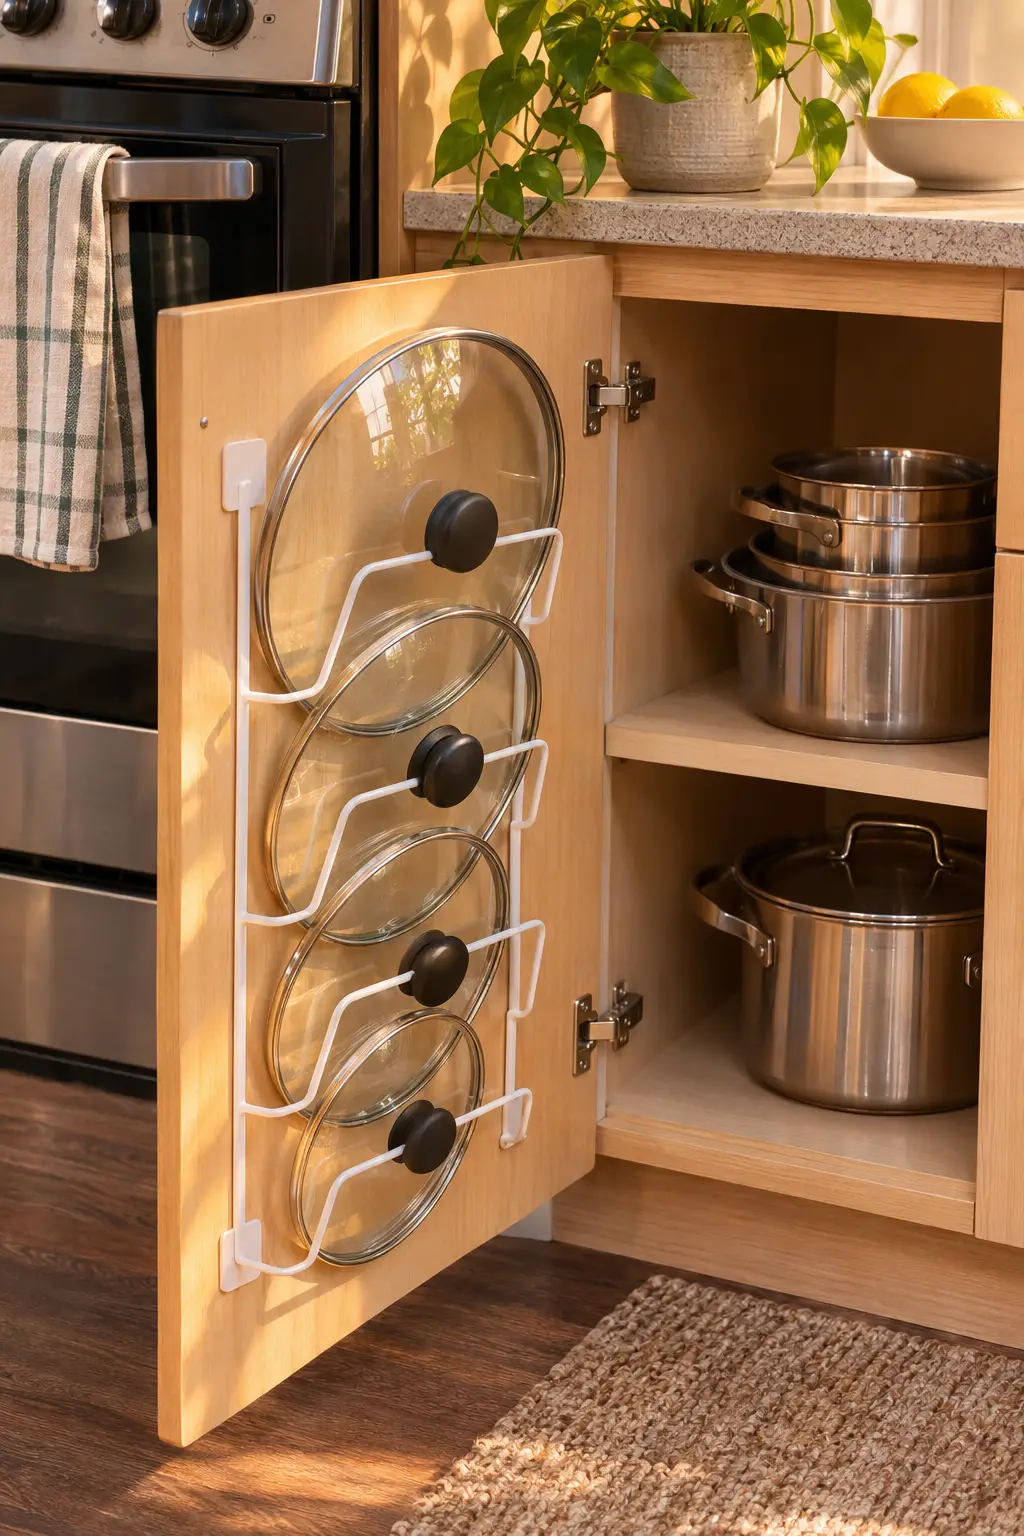
Pot lids are the hardest thing in the kitchen to stack.
They slide and clatter, and they keep the pans underneath from nesting flat. The fix is to get them off the shelf and onto the back of the cabinet door, which is usually blank.
Adhesive lid racks stick on without screws. Two adhesive hooks at the same height also work. Space them a little closer together than the lid is wide, so the rim rests on both hooks.
Make sure the rack clears the shelf edge when the door closes. Open and shut the door a few times before you load it up.
4. Cut Your Food Containers Down to One Nesting Set
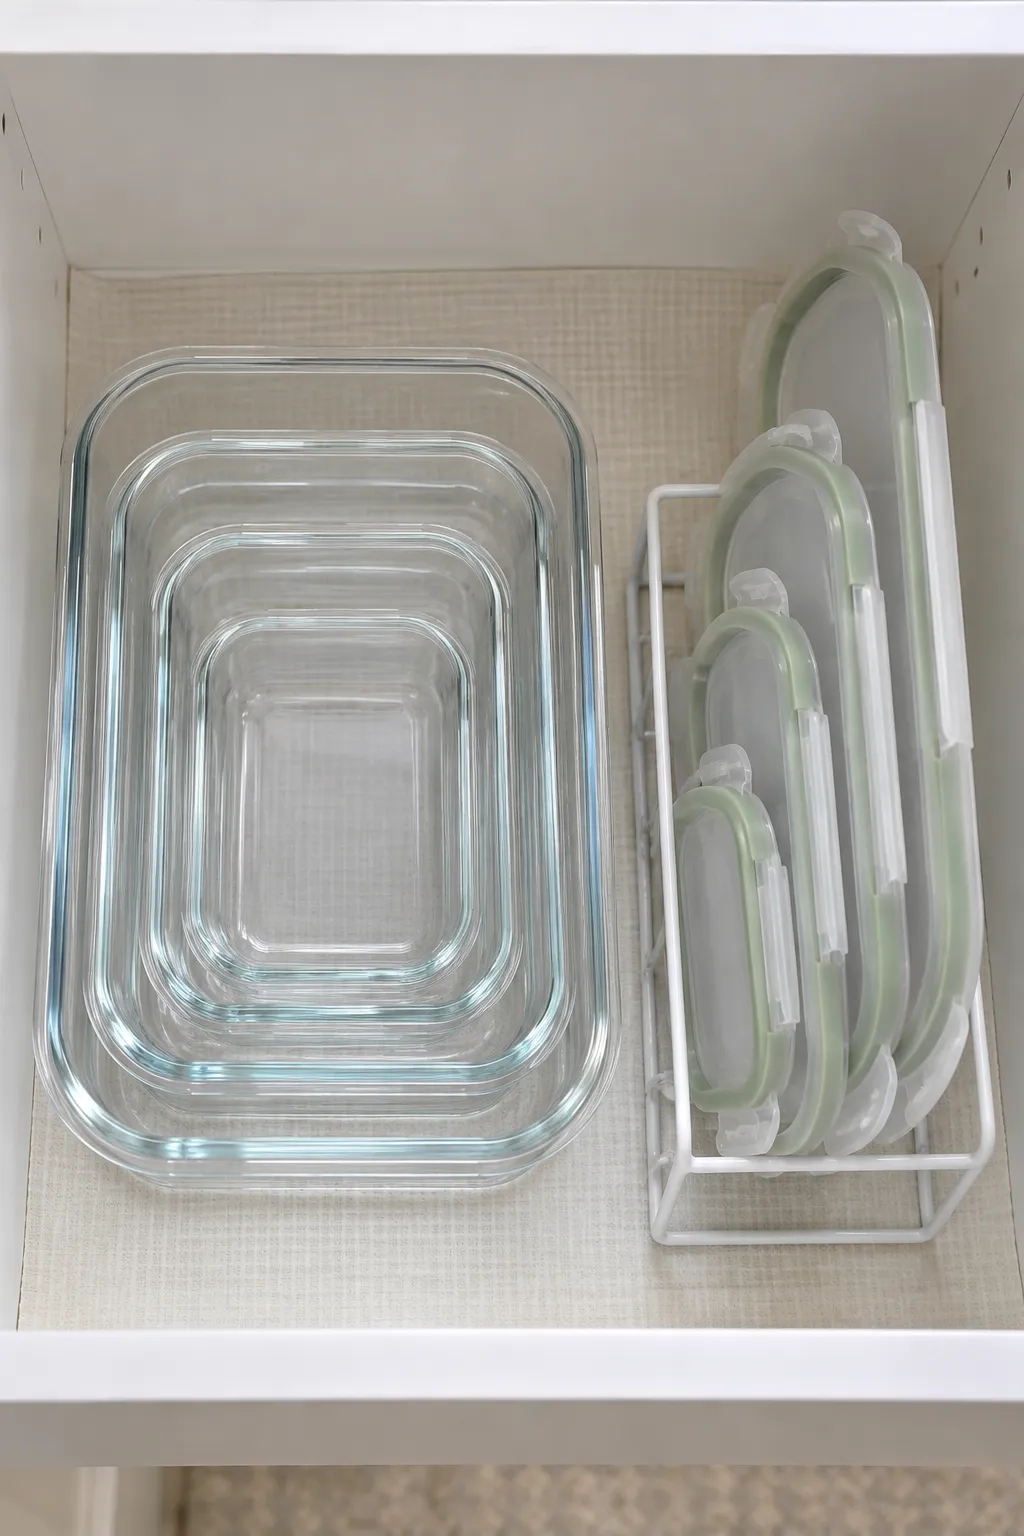
One brand, one shape, one stack. That’s the whole rule.
Mismatched food containers are why that cabinet never closes. Different brands don’t nest inside each other, so ten loose ones can take up more room than a full set that stacks. The lids slide into every gap.
Pull every container out and match each one to its lid. Anything without a partner goes. From what’s left, keep the set that nests best and donate the odd ones out.
Store the lids standing up in a small file holder or a dish drying rack, right next to the stack.
What earns a spot in the keep stack
5. File Baking Sheets and Cutting Boards on Their Sides
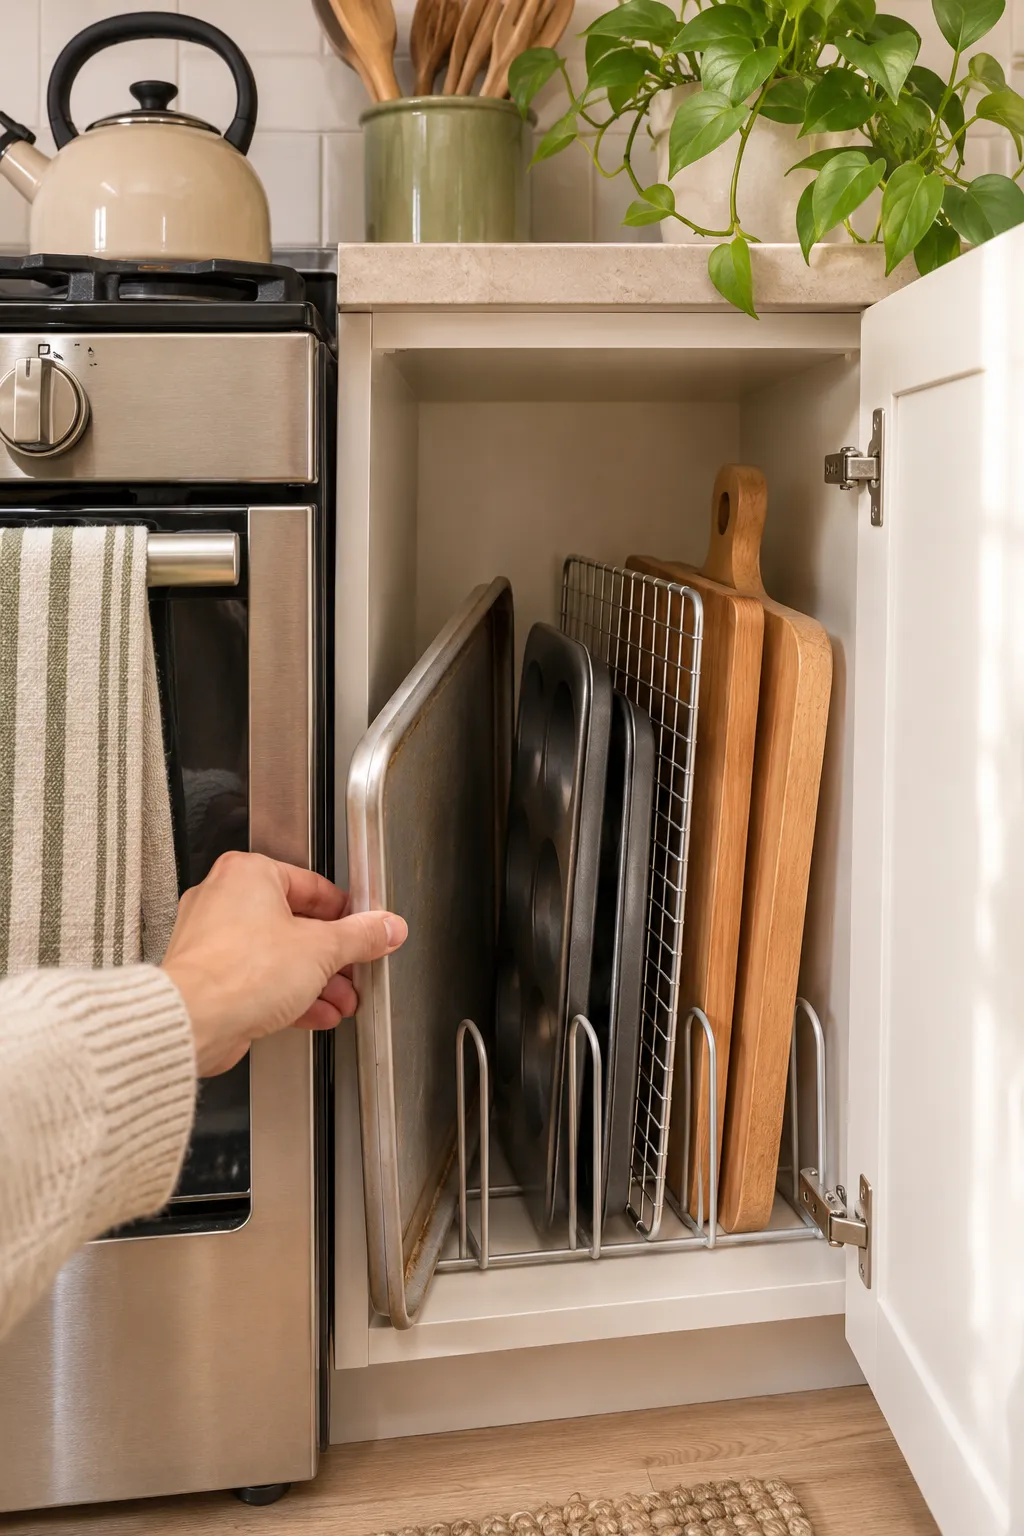
Getting a sheet pan out of a stack usually means lifting the cooling rack, two cutting boards, and a muffin tin. Then you put them all back with a crash.
Stand them up instead, like files in a folder. Each piece gets its own slot, so you slide out the one you need and leave the rest alone.
A few easy ways to set it up:
- A metal magazine file in a lower cabinet
- A pan organizer rack with adjustable dividers
- Two tension rods set upright in a narrow cabinet
The skinny cabinet next to the stove, the one too narrow for anything else, is usually the best spot for this.
One deep shelf holds a wobbly pile of pans and boards. Every pull takes two hands, and something always slides off.
The same pieces stand in a rack in the skinny cabinet. The deep shelf is now free for pots and the mixing bowls.
6. Put a Turntable in the Corner Cabinet Nobody Can Reach
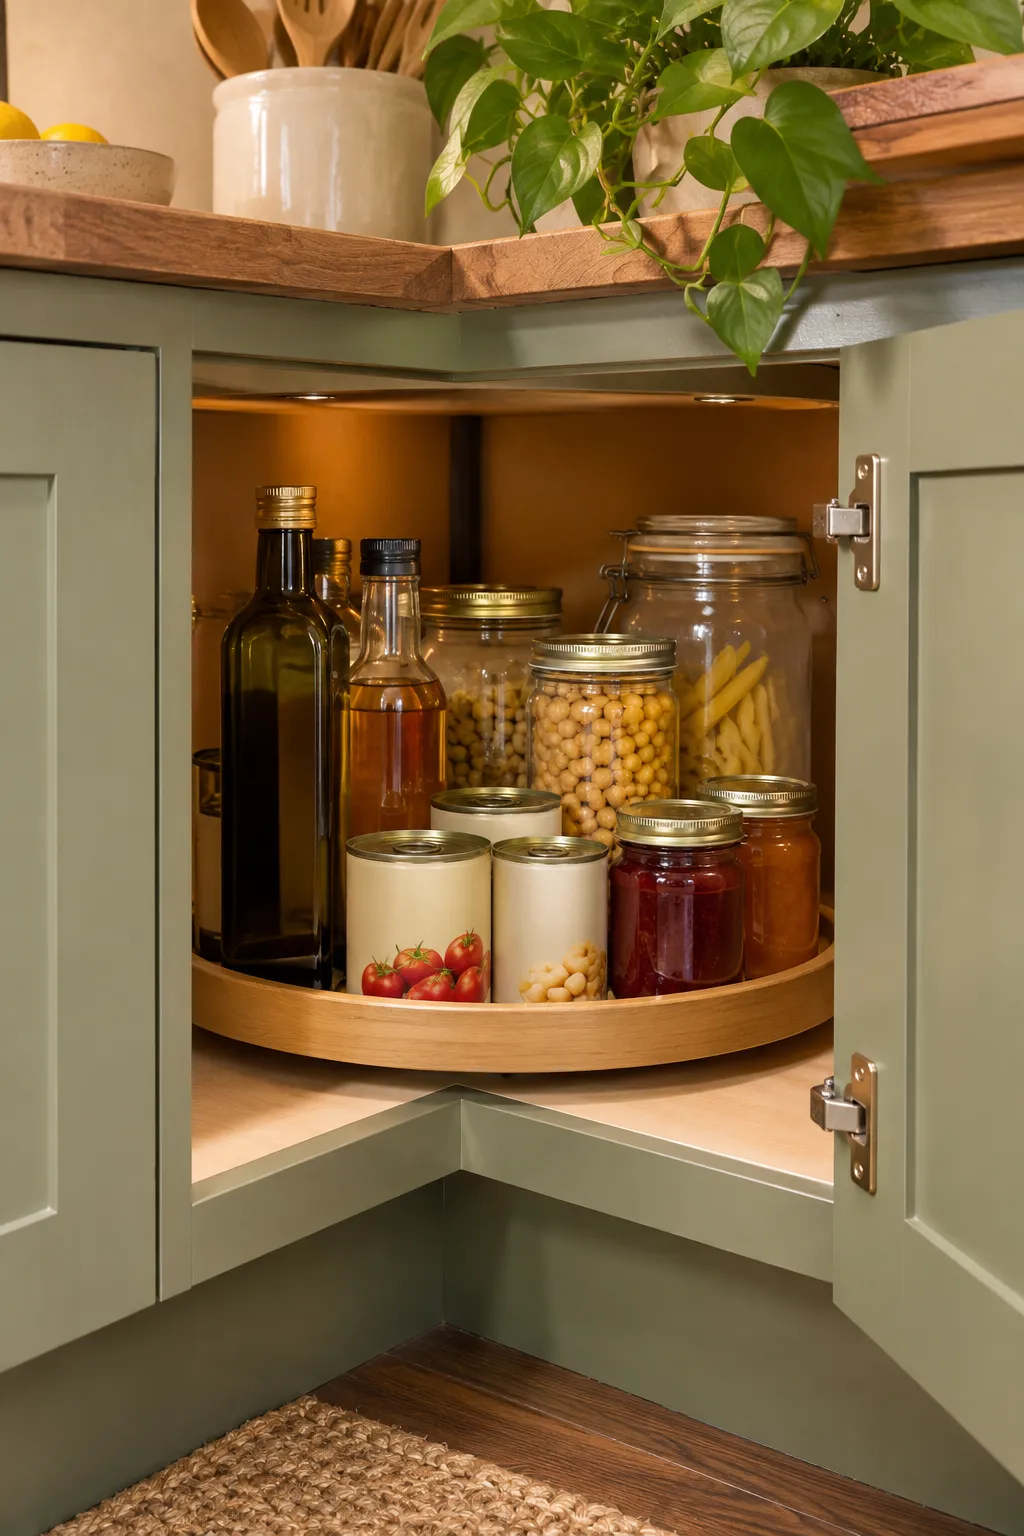
A corner cabinet isn’t wasted space. It has a front row and a back row, and nobody ever reaches the back row.
A turntable, sometimes called a lazy Susan, fixes that. You spin the back to the front instead of crawling in after it. Pick one with a raised edge so nothing slides off mid-spin.
Good things to load onto it:
- Oils, vinegars, and bottled sauces
- Canned goods
- Jars of jam, honey, and nut butter
If the corner cabinet is tall, a two-tier turntable gives you a second spinning level in the same spot.
Empty the corner and measure two things: how deep the cabinet is, and how wide the narrowest part of the door opening is.
Choose a turntable a little smaller than both, so it spins without catching on the hinge or the door frame.
Put heavy bottles near the middle and small jars around the edge. Then give it one full spin with the door open to check nothing bumps.
7. Treat Deep Lower Cabinets Like Drawers With Pull-Out Bins
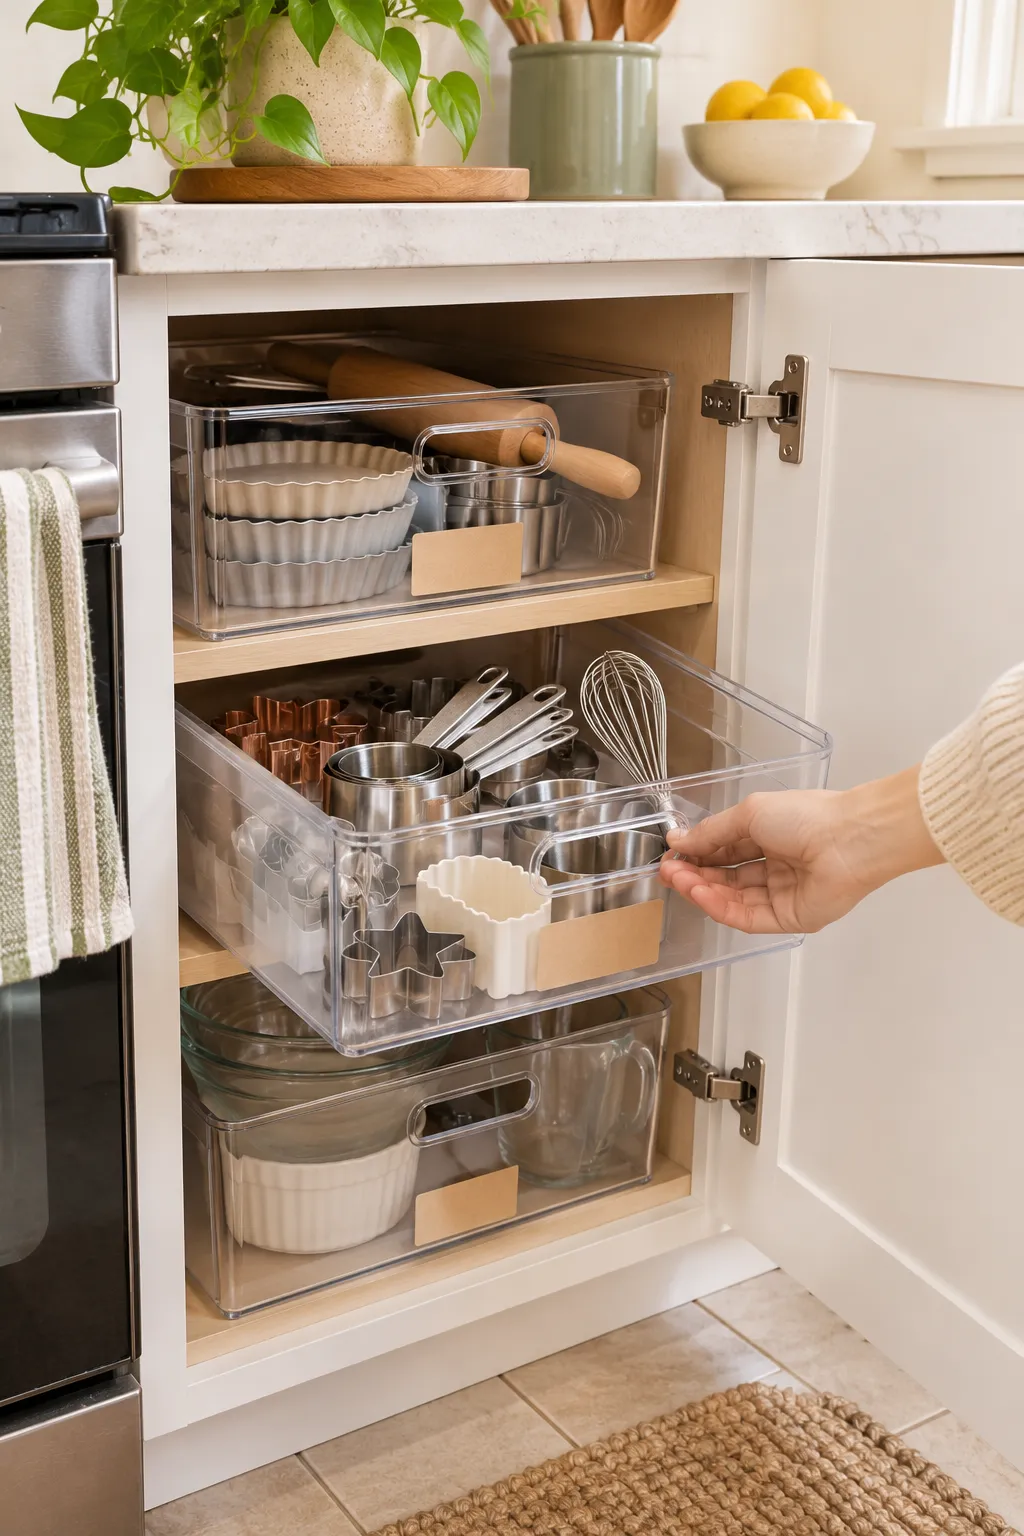
Bins with handles give a deep cabinet the one thing it’s missing: a way to bring the back row to you.
Instead of reaching past the colander to get the grater, you pull the whole bin out, take what you need, and slide it back. Give each bin one job so you know where things live:
- Baking: measuring cups, cookie cutters, piping bags
- Snacks: granola bars, crackers, chips
- Lunch packing: small containers, ice packs, reusable bags
Put a label on the front edge of each bin. You’ll stop opening three bins to find one thing.
Pick bins a little shorter than the shelf gap so they slide out without tipping.
Choose bins with a handle or cutout on the front for an easy grip.
Go clear for anything you need to spot at a glance.
Bins wider than the door opening. They won’t come out past the hinge.
Soft fabric bins that sag in the middle once they’re full.
Lids. You’ll stop opening them within a week.
8. Hang Mugs From Cup Hooks Under the Shelf
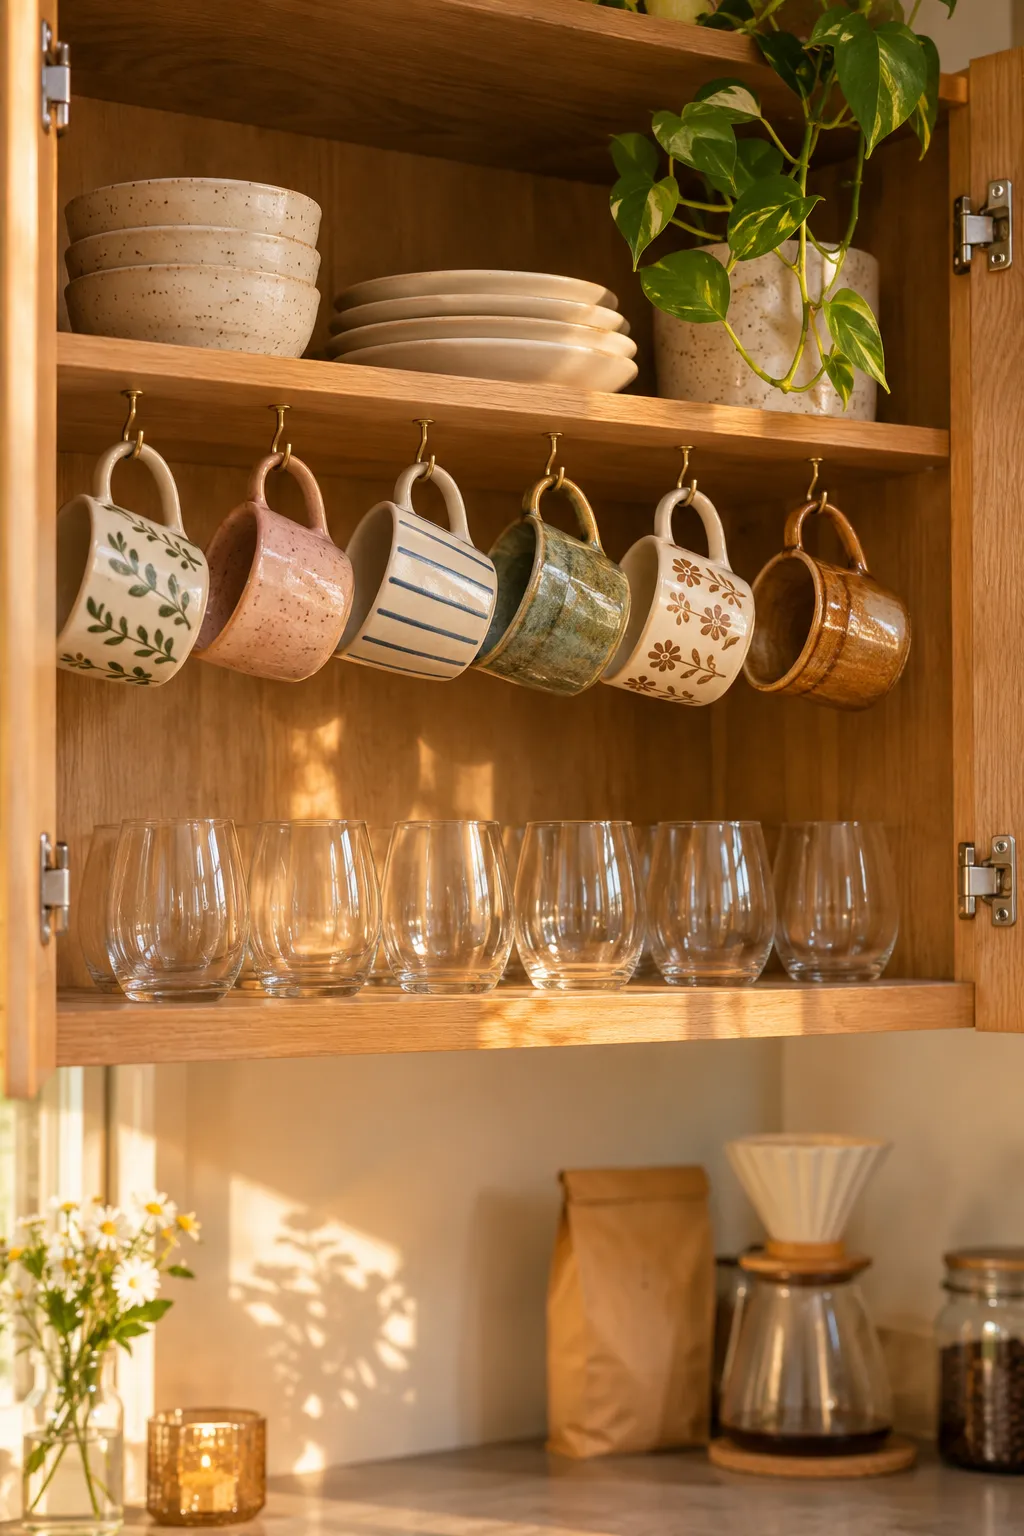
Most kitchens have more mugs than anyone could use in a week, and every one of them wants its own spot on the shelf.
Cup hooks let them hang instead. Screw a row of small hooks into the underside of the shelf above, about a mug’s width apart. Then hang the mugs by their handles. The shelf below opens up for glasses or bowls.
Hang only the mugs you use every day. The extras can go up top, or out the door.
No screws allowed? An under-shelf mug rack slides onto the shelf edge and leaves no holes.
⚠️ Watch Out
Check how thick your shelf is before you buy hooks. The screw part has to be shorter than the shelf, or it will poke through the top. Skip screw hooks on glass or thin wire shelves. If your lease is strict about holes, ask first or use the slide-on rack.
9. Swap Bulky Bags and Boxes for Square Containers
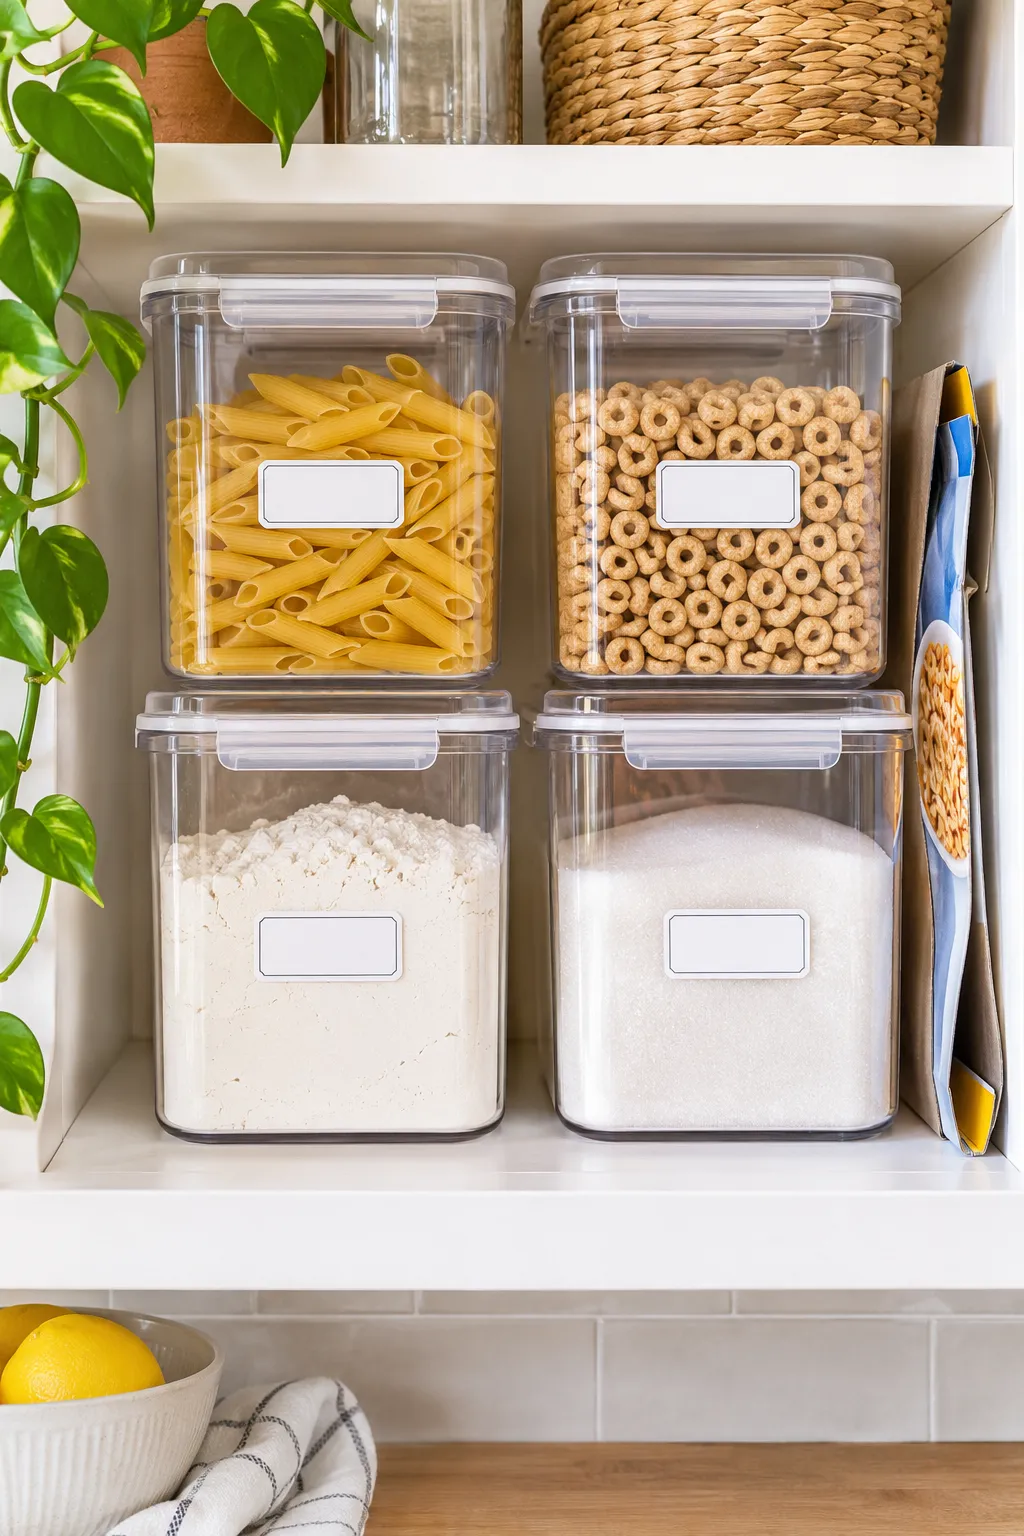
Leaving food in its original packaging feels like the easy choice. But bags slump, boxes hold a lot of air, and round tubs leave gaps at every corner.
Square and rectangle containers line up edge to edge with nothing wasted between them. They stack, too. One shelf can hold two neat layers instead of a single row of tipping bags.
Start small. Decant the three things you buy most, not the whole pantry.
Cut the cooking directions off the package and tape them to the back of the container. A small date label on the front tells you what’s oldest.
10. Use a Tension Rod Under the Sink for Spray Bottles
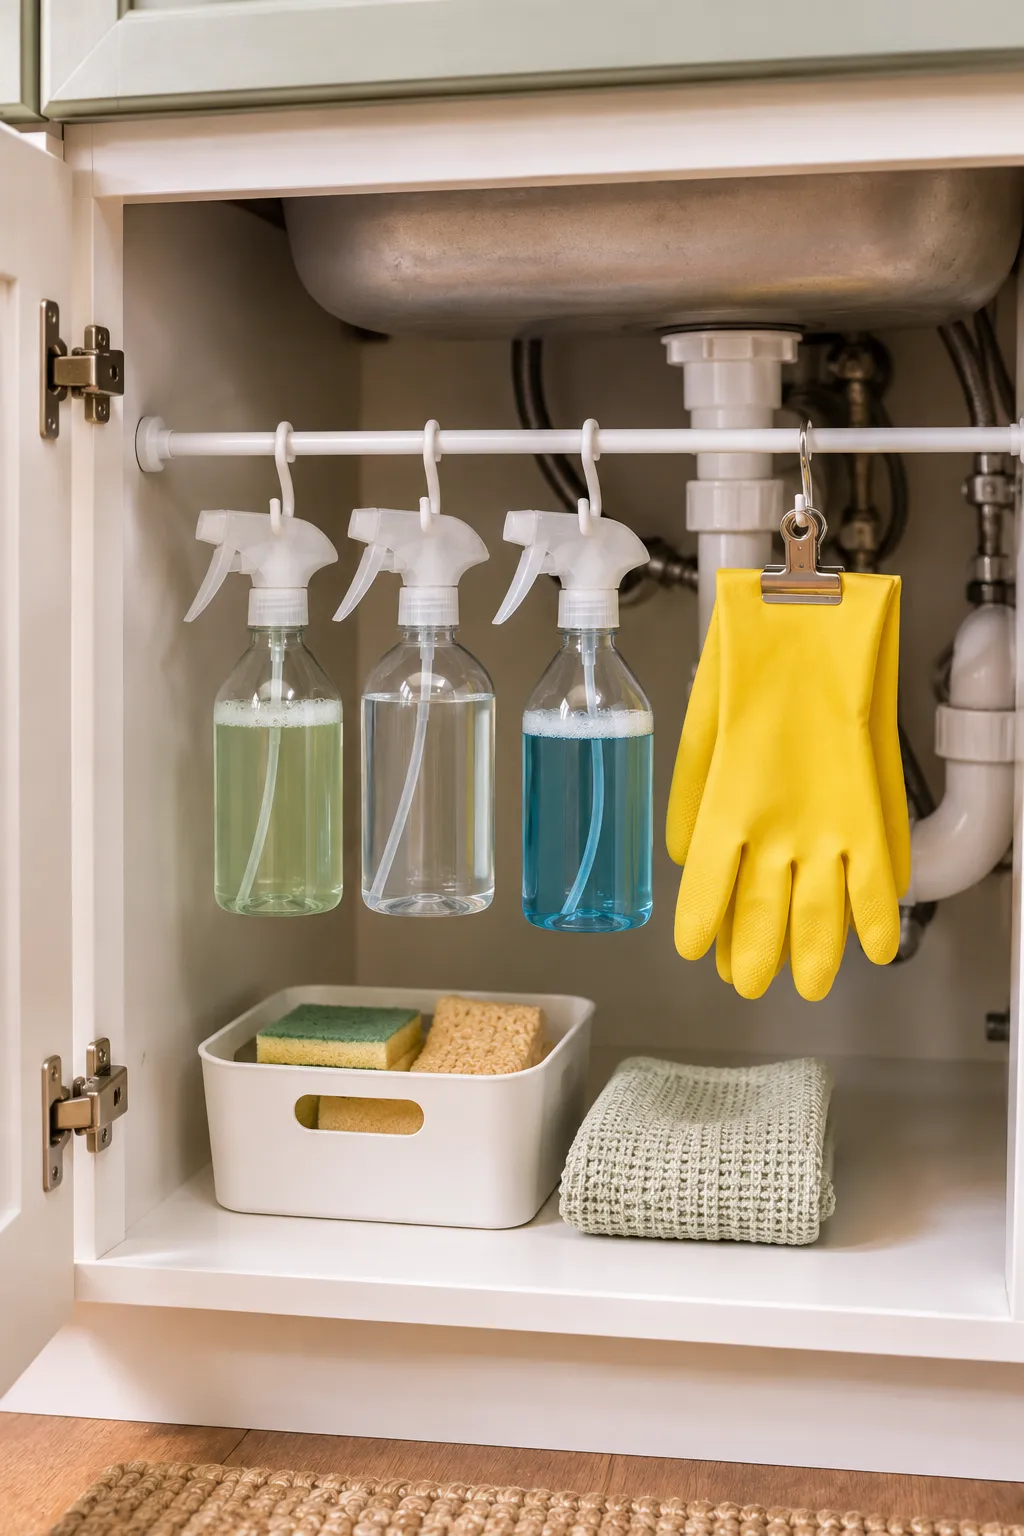
Set a tension rod across the cabinet under the sink, a few inches below the top. Twist it tight between the side walls, then hang spray bottles from it by their triggers.
That one rod gets every bottle off the cabinet floor. The space underneath opens up for a bin of sponges and trash bags.
The rod can also hold:
- Rubber gloves on a clip
- A drying cloth or dish towel
- A small hanging caddy for scrub brushes
Keep the rod in front of the pipes, not behind them. You want to be able to reach the shutoff valves fast if the sink ever leaks.
| Tension Rod | Two-Tier Sliding Organizer | |
|---|---|---|
| Best for | Spray bottles and gloves | Refills, sponges, and short bottles |
| Cost | Very low | Low to medium |
| Works around pipes | Yes, it sits above them | Only if it’s adjustable or U-shaped |
| Setup | A few minutes, no tools | Some assembly |
11. Line Up Spices on a Tiered Riser So Every Label Shows
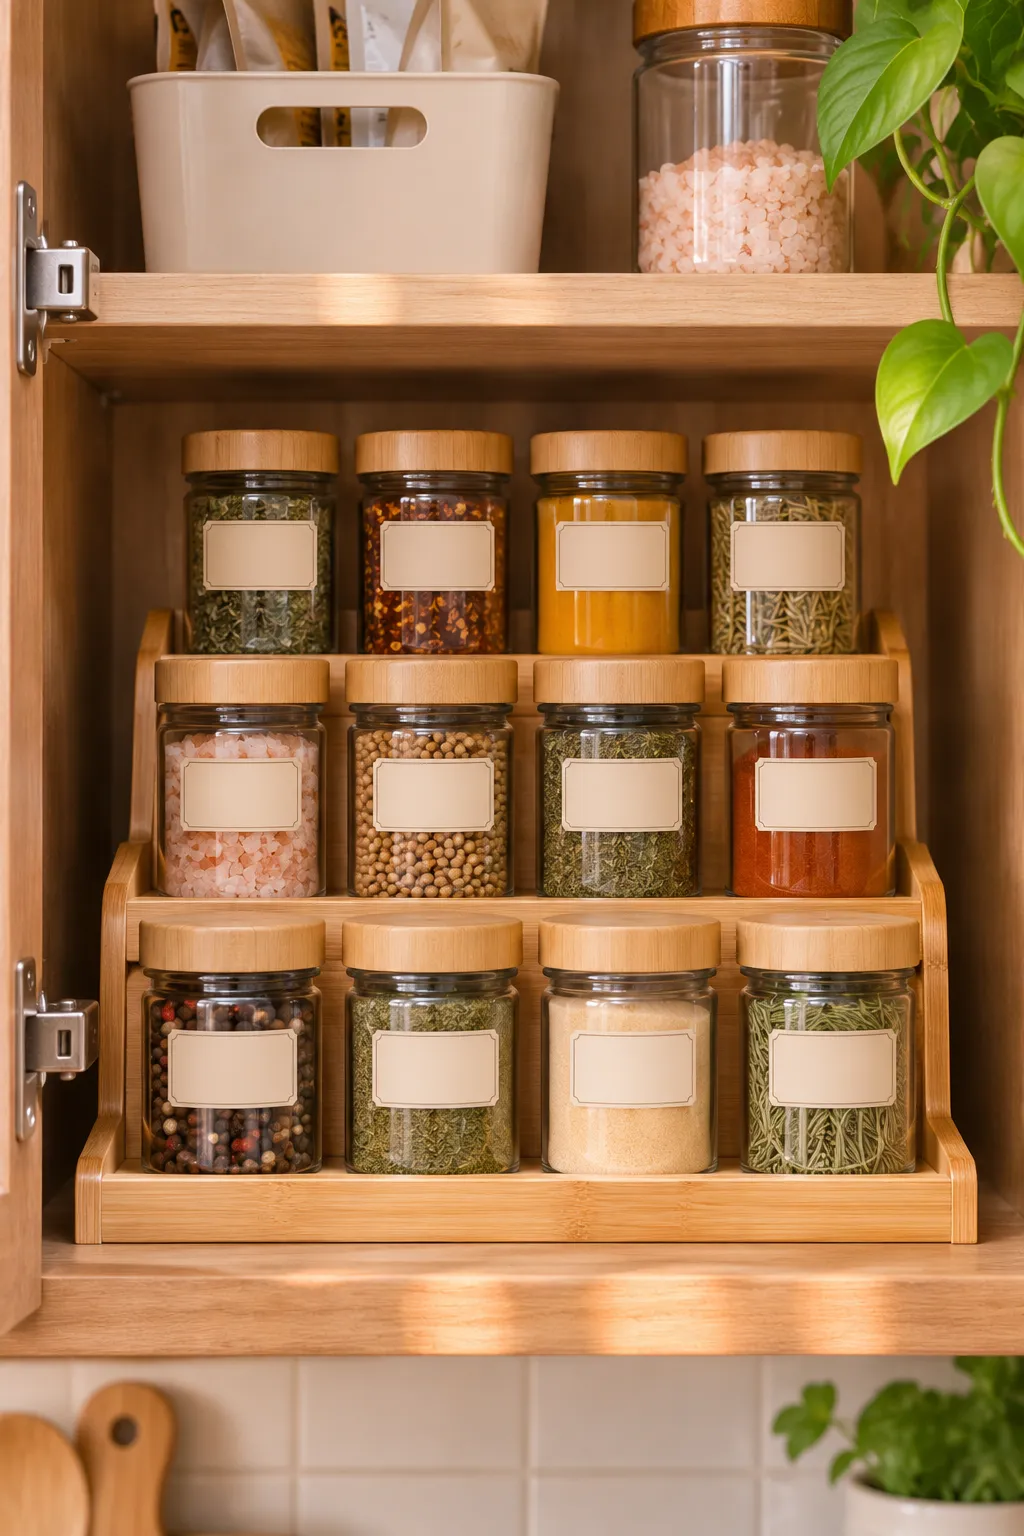
Buying a second jar of cumin because the first one was hiding in the back is a very small-kitchen problem.
Spices in a flat row only show you the front jar. A tiered riser works like stadium seating, so each jar sits a little higher than the one in front of it. You can read every label without moving anything.
A few habits help it work:
- Turn every jar so the label faces out
- Put the spices you use each week on the front step
- Keep refill bags in one small bin on a different shelf
Alphabetical order sounds fussy, but it saves real time when you’re in the middle of a recipe.
Three rows of jars, and only the front row is visible. Finding the paprika means lifting half the shelf out.
Three short steps with every label in sight. The doubles you found while sorting go into one refill bin, so you stop buying more.
12. Give Eye-Level Shelves to the Things You Use Every Day
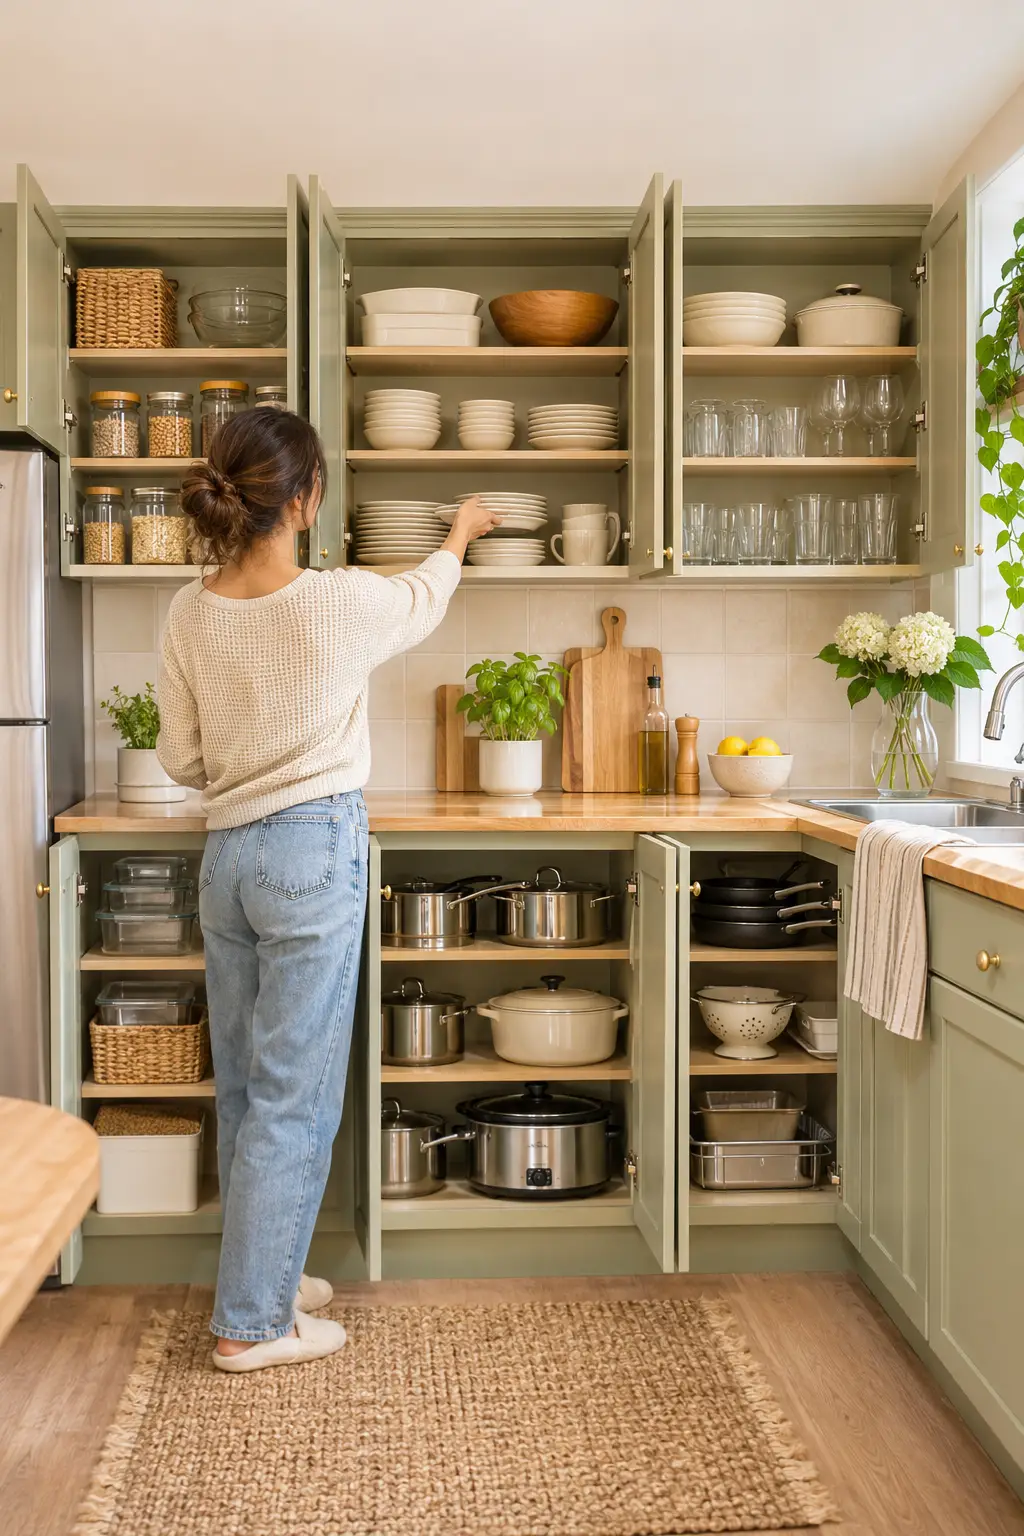
The easiest shelf to reach is the most valuable one in the kitchen. Give it to the things you touch every day.
That usually means the shelves between your shoulders and your waist. Your plates, everyday glasses, coffee things, and the one pan you cook with most belong here. Everything else gets sorted by how often you use it:
- Eye level: daily plates, glasses, your main pan
- Up high: light things you use weekly or less
- Down low: heavy pots, the slow cooker, big mixing bowls
Keep heavy things low. Reaching overhead for a cast iron pan is how pans get dropped.
If you reach for it every day, it should never be behind something else or under something heavier.
13. Slide Wire Baskets Under Shelves for Foil, Wrap, and Bags
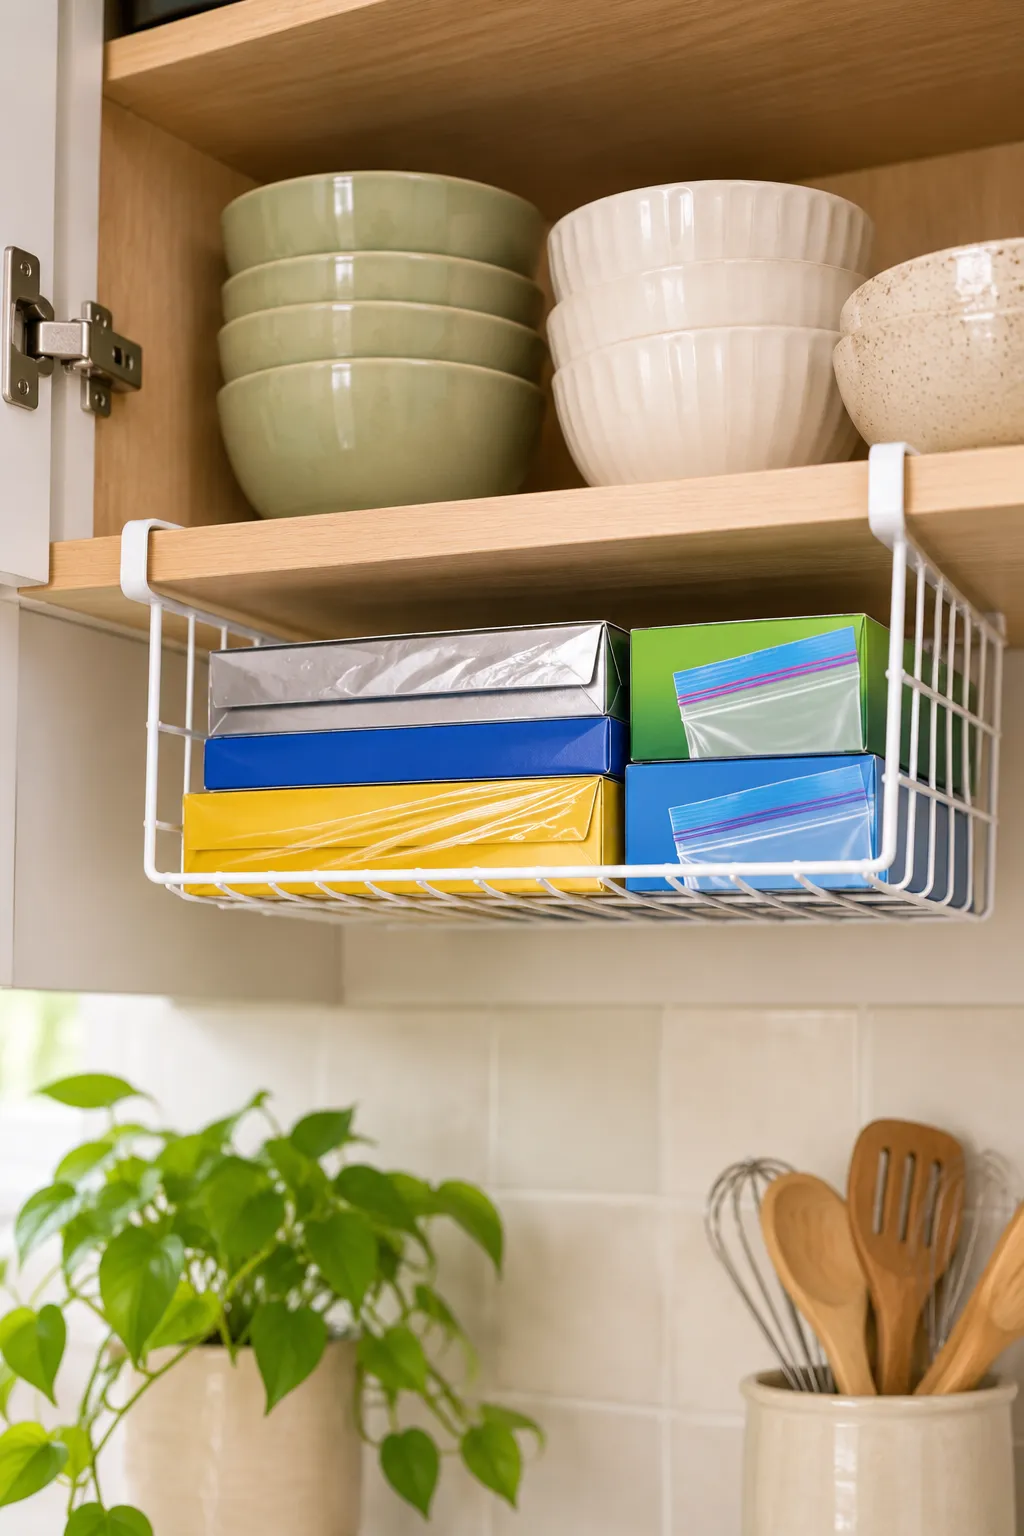
The underside of a shelf is the one surface in a cabinet that nothing ever touches.
An under-shelf wire basket clips onto the shelf and hangs below it. That gives you a slim drawer in space that was doing nothing. It slides on, so there are no screws or holes.
It works best for flat, light things that usually get crushed or lost at the bottom of a drawer. Check how thick your shelf is first, since most baskets only clip onto shelves up to a certain thickness.
Keep it to light items. Cans and jars will make the basket sag.
- ▸Boxes of foil, plastic wrap, and parchment paper
- ▸Zip-top bags in every size
- ▸Tea bags and drink packets
- ▸Seasoning mix envelopes
- ▸Folded cloth napkins or spare dish towels
14. Move the Once-a-Year Stuff Out of the Kitchen
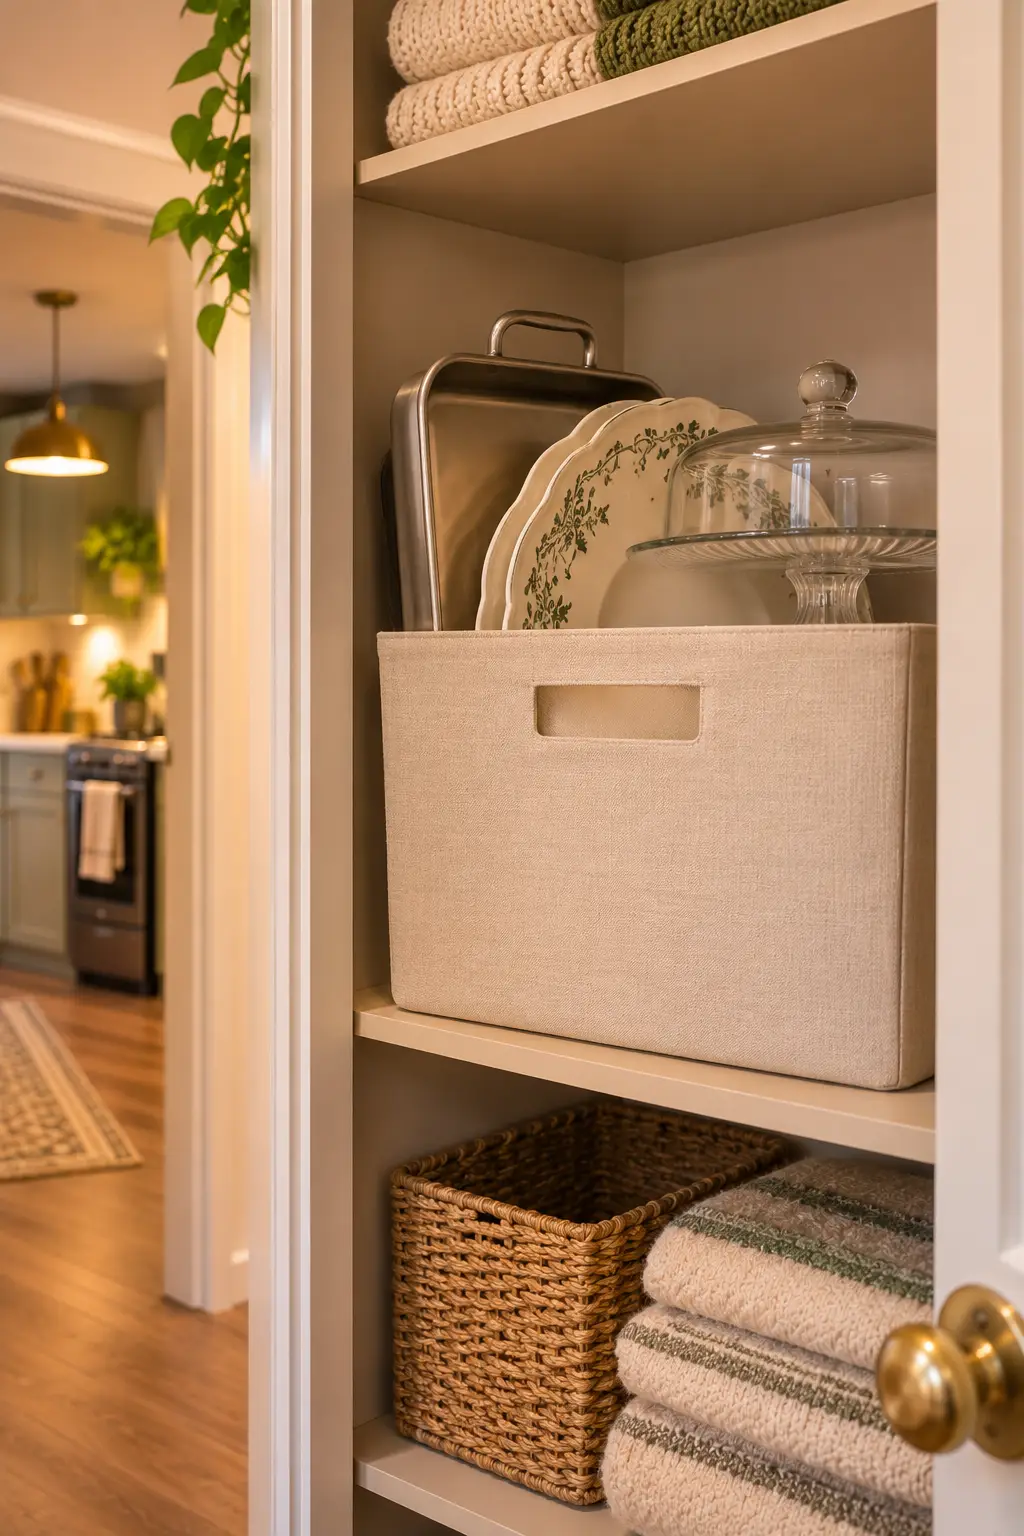
Not everything you use in the kitchen has to live in the kitchen.
The big seasonal pieces are often the worst offenders. They sit in the deepest cabinets all year and get used once or twice. Meanwhile, your everyday pans fight for space.
Give them a home somewhere else. A hall closet shelf, a bin under the bed, or the top of a wardrobe all work. Pack them together in one labeled bin so you can find everything when the holidays come around.
Clearing out one cabinet’s worth of these is often enough to free a whole shelf for daily things.
Good candidates for the closet bin
15. Keep It Working With a One-In, One-Out Rule
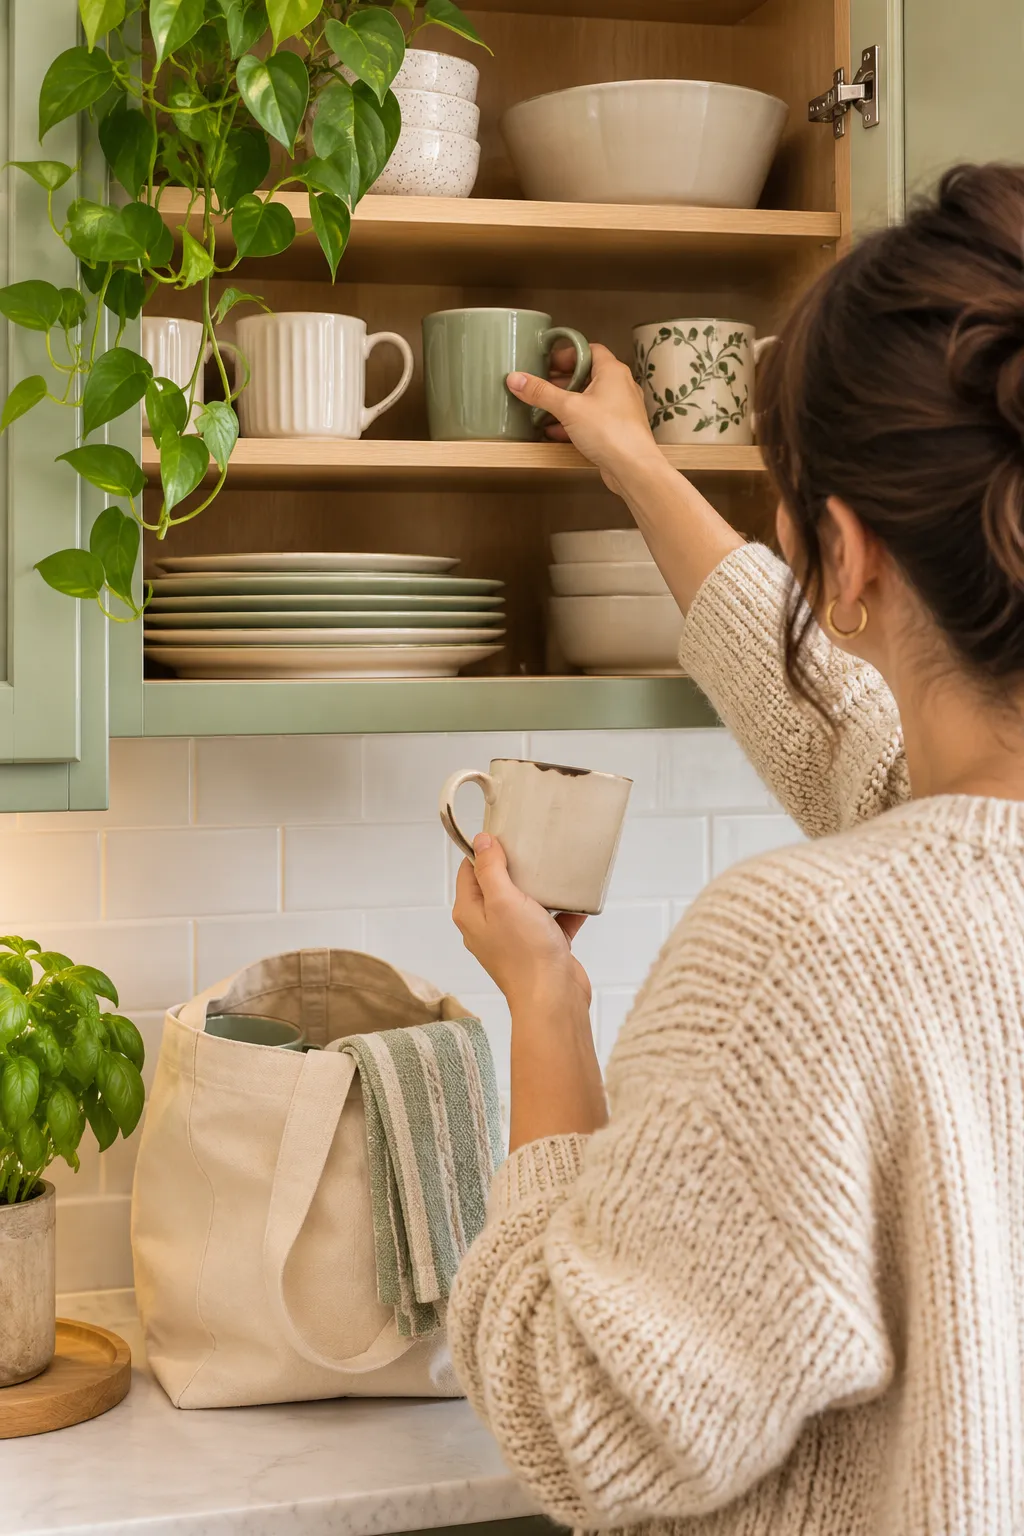
Cabinets don’t stay organized on their own. New things sneak in, like a mug from a work party or a gadget from a sale. Within a month, the shelves are full again.
The fix is a simple rule. When something new comes in, something similar goes out. A new pan means the old warped one leaves. A new mug means one from the shelf goes in the donation bag.
Pair it with a quick weekly reset:
- Push things back to their spots
- Toss anything expired from the bins
- Wipe down one shelf
It’s small and a little boring, and it’s the reason the other fourteen ideas keep working.
A small kitchen doesn’t need more cabinets. It needs the ones it already has to work a little harder. Most of that comes down to a few simple moves: stand things up, use the air above and below each shelf, and move out what you rarely touch.
You don’t have to tackle all of these tiny kitchen organization ideas this weekend. Pick one cabinet, empty it, and put back only what earns its spot. Once one shelf feels easy to use, you’ll want to do the next one.
Save this list to your kitchen board so it’s there the next time a cabinet door won’t close.
Your first three moves